Peaches and Cream Bars: 5 Irresistible Summer Delights Recipe
Introduction
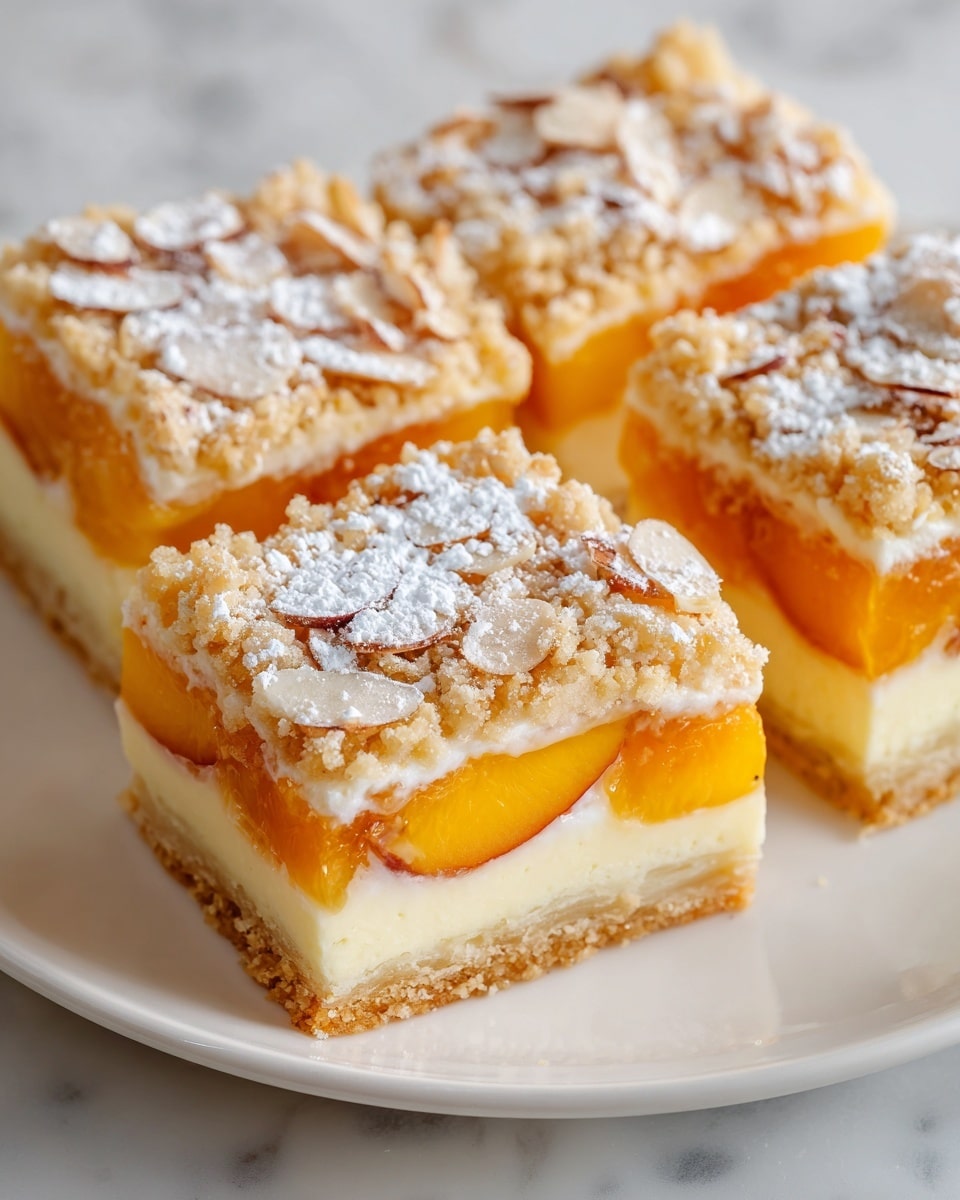
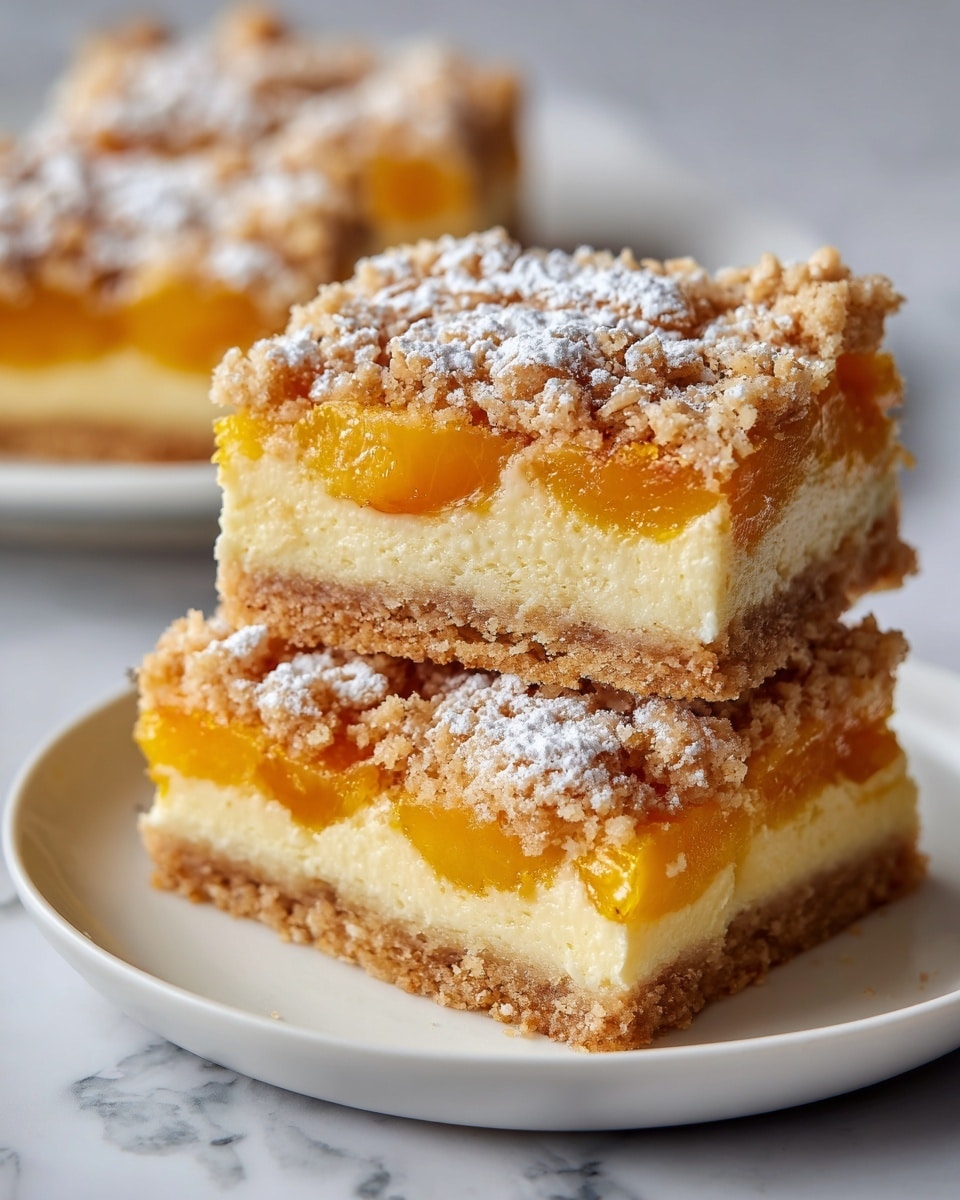
These Peaches and Cream Bars are a delightful summer treat that combines juicy fresh peaches with a creamy, sweet filling and a buttery crust. Perfect for a picnic or a simple dessert, they offer a refreshing twist on traditional bars.
Ingredients
- 2 cups fresh peaches, diced
- 1 cup cream cheese, softened
- 1/2 cup sugar
- 1 teaspoon vanilla extract
- 1 cup all-purpose flour
- 1/2 cup butter, melted
- 1/2 teaspoon baking powder
- 1/4 teaspoon salt
Instructions
- Step 1: Preheat your oven to 350°F (175°C).
- Step 2: In a bowl, mix the flour, baking powder, and salt until combined.
- Step 3: In another bowl, beat the cream cheese, sugar, and vanilla extract together until smooth and creamy.
- Step 4: Add the melted butter to the flour mixture and stir until the dough comes together.
- Step 5: Press half of the dough evenly into the bottom of a greased baking dish.
- Step 6: Spread the cream cheese mixture evenly over the dough layer.
- Step 7: Scatter the diced fresh peaches on top of the cream cheese layer.
- Step 8: Crumble the remaining dough over the peaches to create a crumbly topping.
- Step 9: Bake for 30-35 minutes, or until the bars are golden brown on top.
- Step 10: Allow the bars to cool completely before cutting into squares to serve.
Tips & Variations
- For extra flavor, sprinkle a bit of cinnamon or nutmeg over the peaches before adding the crumb topping.
- You can substitute cream cheese with mascarpone for a richer texture.
- Use frozen peaches if fresh are not in season; just be sure to thaw and drain excess liquid beforehand.
- Adding chopped nuts like pecans or almonds to the crumb topping adds a nice crunch.
Storage
Store the peaches and cream bars in an airtight container in the refrigerator for up to 3 days. For best results, bring to room temperature or warm slightly before serving. These bars can also be frozen for up to 1 month; thaw overnight in the fridge before enjoying.
How to Serve
Serve this delicious recipe with your favorite sides.
FAQs
Can I use canned peaches instead of fresh?
Yes, canned peaches work well but be sure to drain them thoroughly to avoid excess moisture that could make the bars soggy.
How do I prevent the crust from being too soft?
Press the crust firmly into the pan and bake for the full time until golden brown. Cooling completely also helps it set up for a firmer texture.
PrintPeaches and Cream Bars: 5 Irresistible Summer Delights Recipe

These Peaches and Cream Bars are a delightful summer treat combining fresh, juicy peaches with a creamy, sweet cream cheese layer nestled between buttery crumbly dough. Perfect for a refreshing dessert or snack, they bake to golden perfection in under an hour.
- Prep Time: 15 minutes
- Cook Time: 35 minutes
- Total Time: 50 minutes
- Yield: 12 bars 1x
- Category: Dessert
- Method: Baking
- Cuisine: American
- Diet: Vegetarian
Ingredients
Fruit Layer
- 2 cups fresh peaches, diced
Cream Cheese Layer
- 1 cup cream cheese, softened
- 1/2 cup sugar
- 1 teaspoon vanilla extract
Dough
- 1 cup all-purpose flour
- 1/2 teaspoon baking powder
- 1/4 teaspoon salt
- 1/2 cup butter, melted
Instructions
- Preheat Oven: Preheat your oven to 350°F (175°C) to prepare for baking the bars.
- Mix Dry Ingredients: In a bowl, combine the flour, baking powder, and salt for the dough base.
- Prepare Cream Cheese Mixture: In another bowl, beat the softened cream cheese, sugar, and vanilla extract together until the mixture is smooth and creamy.
- Combine Butter and Flour Mixture: Add the melted butter to the bowl with the flour mixture, stirring until a crumbly dough forms.
- Form Base Layer: Press half of the dough evenly into the bottom of a greased baking dish to create the base of the bars.
- Add Cream Cheese Layer: Spread the cream cheese mixture evenly over the dough base layer in the dish.
- Top with Peaches: Distribute the diced fresh peaches evenly over the cream cheese layer.
- Add Crumble Topping: Crumble the remaining half of the dough over the peaches to form a crumbly topping.
- Bake: Place the baking dish in the preheated oven and bake for 30-35 minutes or until the top is golden brown and the bars are set.
- Cool and Serve: Remove from oven and allow the bars to cool completely before cutting into 12 bars for serving.
Notes
- Ensure the cream cheese is softened for easier mixing and a smoother texture.
- Use ripe but firm peaches for the best flavor and texture that holds during baking.
- Grease the baking dish well to prevent sticking.
- Allow the bars to cool fully to set properly and make clean cutting easier.
- For an extra touch, sprinkle cinnamon or nutmeg over the peaches before adding the crumble topping.
Keywords: Peaches and Cream Bars, summer dessert, cream cheese dessert, fruit bars, easy baking recipe


