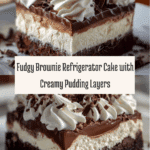
Brownie Refrigerator Cake Recipe
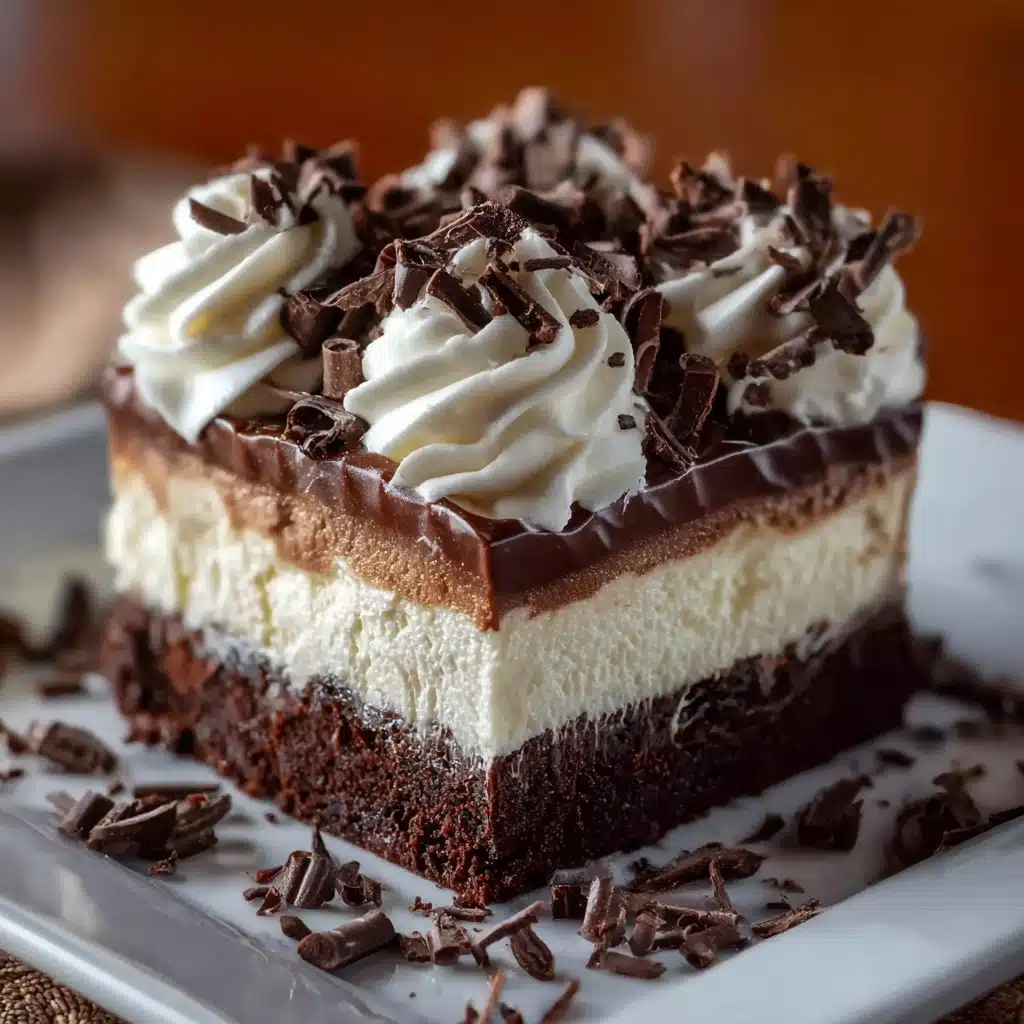
If you’re craving a dessert that’s rich, creamy, and absolutely irresistible, let me introduce you to the Brownie Refrigerator Cake. This delightful treat combines fudgy brownies with luscious layers of cream cheese and pudding, all topped off with fluffy whipped topping and a sprinkle of chocolate goodness. It’s a no-bake kind of magic, meaning you get all the indulgence without the extra fuss. Whether you’re hosting a gathering or just want a special sweet fix, the Brownie Refrigerator Cake will quickly become your go-to favorite!
Ingredients You’ll Need
Getting started with Brownie Refrigerator Cake is surprisingly simple, and the ingredients play a key role in creating those dreamy textures and flavors. From the fudgy brownies to the smooth cream cheese layer and silky pudding, each element brings something special to the plate. Here’s what you’ll need:
- Brownie mix (9×13 pan size): The base of this cake, providing that rich chocolate foundation.
- Extra-large egg: Adding one more egg than the package calls for makes the brownies fudgier and more decadent.
- Cream cheese (8 oz), softened: For the creamy middle layer that adds tang and richness.
- Powdered sugar (1 cup): Sweetens the cream cheese layer perfectly without any graininess.
- Whipped topping (2 containers, 8 oz each): Lightens up the layers and creates that cloudlike finish.
- Chocolate instant pudding (3 oz): Adds depth and intense chocolate flavor to the pudding layer.
- Vanilla instant pudding (3 oz): Balances the chocolate with smooth vanilla creaminess.
- Milk (3 1/2 cups): Necessary to whisk the puddings into perfect, spoonable layers.
- Hershey bar or chocolate syrup: For the final flourish of chocolate shavings or drizzles on top.
How to Make Brownie Refrigerator Cake
Step 1: Bake the Brownies
Start by preparing the brownie mix according to the package instructions, but don’t forget to add one extra-large egg for a denser, fudgier texture. Bake the brownies in a 9×13 pan until set and golden, then let them cool completely. Cooling is important so your following layers don’t melt or run together.
Step 2: Create the Cream Cheese Layer
While the brownies cool, whip up the cream cheese layer. Combine the softened cream cheese with powdered sugar and one container of whipped topping until smooth and fluffy. This creamy spread will provide a tangy contrast to the rich brownies, making every bite perfectly balanced. Once smooth, spread it evenly over the cooled brownies.
Step 3: Prepare the Pudding Layers
Next, whisk together both the chocolate and vanilla instant pudding mixes with the milk. Make sure to beat it well until thick and creamy, as this gives the pudding layer its silky texture. The combination of chocolate and vanilla puddings adds a delightful flavor complexity that ties the whole dessert together.
Step 4: Assemble and Chill
Spread the prepared pudding mixture over the cream cheese layer in an even layer. Then, top everything off with the remaining container of whipped topping, smoothing it out carefully. Finish with chocolate shavings made from a Hershey bar or a generous drizzle of chocolate syrup for that beautiful final touch. Refrigerate for at least two hours to let everything set and chill perfectly before serving.
How to Serve Brownie Refrigerator Cake
Garnishes
Add a little extra flair by garnishing your Brownie Refrigerator Cake with chocolate curls, shavings, or a drizzle of chocolate syrup. Fresh raspberries or a few mint leaves can also brighten the look and taste, adding a refreshing twist that complements the creamy layers beautifully.
Side Dishes
This cake is a dessert that stands strong on its own, but if you want to round out your dessert spread, serve it alongside a scoop of vanilla ice cream or a dollop of fresh whipped cream. A cup of hot coffee or a cold glass of milk makes the perfect beverage companions.
Creative Ways to Present
Try serving Brownie Refrigerator Cake in elegant glass trifle bowls or individual parfait glasses to showcase all those amazing layers. You can also slice it into neat squares and plate each piece with an extra drizzle of chocolate sauce and a sprinkle of nuts for a classy touch that’s sure to impress your guests.
Make Ahead and Storage
Storing Leftovers
Once your Brownie Refrigerator Cake is made, cover it tightly with plastic wrap or store it in an airtight container to keep it fresh. It will stay delicious in the refrigerator for up to 4 days, giving you plenty of time to enjoy each bite.
Freezing
If you want to save some for later, Brownie Refrigerator Cake freezes well. Wrap individual slices in plastic wrap and place them in a freezer-safe container. To enjoy, thaw overnight in the refrigerator to preserve the texture and flavor.
Reheating
This dessert is best enjoyed cold, so reheating isn’t recommended. Instead, let it thaw properly in the fridge and serve at a cool temperature to maintain the luscious layers and creamy textures.
FAQs
Can I use homemade brownies instead of a mix?
Absolutely! Homemade brownies can add an even more personalized touch to your Brownie Refrigerator Cake. Just be sure they fit a 9×13 pan size and cool completely before assembling.
Is it necessary to add the extra egg to the brownie mix?
While it’s not mandatory, adding an extra egg makes the brownies fudgier and richer, which enhances the overall texture of the cake beautifully.
Can I substitute the instant pudding flavors?
Yes, you can experiment with different pudding flavors, but chocolate and vanilla complement the cream cheese and brownies perfectly for the classic Brownie Refrigerator Cake taste.
How long does the dessert need to chill?
A minimum of two hours in the fridge is essential to allow the layers to set properly and for the flavors to meld into the delightfully creamy delight that is Brownie Refrigerator Cake.
Can I make this dessert gluten-free?
Definitely! Use a gluten-free brownie mix and ensure the instant puddings and other ingredients are gluten-free to enjoy this dessert without worries.
Final Thoughts
Brownie Refrigerator Cake is truly one of those rare treats that feel indulgent yet come together with ease. Its layers of fudgy brownies, creamy cheese, and luscious pudding are a party in every bite. I encourage you to try making this at home—once you do, it’s likely to become a dessert staple in your recipe collection. Get ready to impress your family and friends with this utterly delicious and effortlessly elegant cake!
PrintBrownie Refrigerator Cake Recipe

This Brownie Refrigerator Cake is a luscious layered dessert that combines fudgy homemade brownies with creamy layers of sweetened cream cheese, whipped topping, and rich chocolate and vanilla pudding. Chilled to perfection and topped with chocolate shavings or syrup, this cake is an indulgent treat perfect for gatherings or a special dessert at home.
- Prep Time: 20 minutes
- Cook Time: 35 minutes
- Total Time: 2 hours 55 minutes
- Yield: 12 servings 1x
- Category: Dessert
- Method: Baking and Refrigerating
- Cuisine: American
- Diet: Vegetarian
Ingredients
Brownie Layer
- 1 brownie mix (9×13 pan size)
- 1 additional extra-large egg
Cream Cheese Layer
- 1 package cream cheese (8 oz), softened
- 1 cup powdered sugar
- 1 container whipped topping (8 oz)
Pudding Layer
- 1 package chocolate instant pudding (3 oz)
- 1 package vanilla instant pudding (3 oz)
- 3 1/2 cups milk
Topping
- 1 container whipped topping (8 oz)
- 1 Hershey bar (for shavings) or chocolate syrup (for garnish)
Instructions
- Prepare Brownies: Prepare the brownies according to the package directions, adding the extra-large egg to make the texture fudgier. Pour the batter into a 9×13 inch pan and bake as directed. Once baked, allow the brownies to cool completely before adding the next layers.
- Make Cream Cheese Layer: In a bowl, blend the softened cream cheese with powdered sugar until smooth and creamy. Fold in one container (8 oz) of whipped topping until well combined. Spread this mixture evenly over the cooled brownie layer to create a rich and smooth cream cheese layer.
- Prepare Pudding Layer: In another bowl, whisk together the chocolate and vanilla instant pudding mixes with 3 1/2 cups of cold milk. Continue whisking until the pudding thickens. Carefully spread the pudding mixture over the cream cheese layer to create a luscious pudding layer.
- Add Whipped Topping: Spread the remaining container (8 oz) of whipped topping evenly over the pudding layer, smoothing it out to create a light and fluffy topping.
- Garnish and Chill: Garnish the top with chocolate shavings made from the Hershey bar or drizzle with chocolate syrup. Refrigerate the assembled cake for at least 2 hours, allowing the layers to set and flavors to meld before serving.
Notes
- For best results, allow the brownies to cool completely to prevent the cream cheese layer from melting.
- You can substitute homemade brownies if preferred; just ensure the pan size matches for layered consistency.
- Use cold milk when preparing pudding to ensure it sets properly.
- Refrigerate the cake covered to avoid absorbing other fridge odors.
- Variations include adding chopped nuts or a splash of coffee to the pudding for deeper flavor.
Nutrition
- Serving Size: 1 slice (1/12 of cake)
- Calories: 420
- Sugar: 38g
- Sodium: 320mg
- Fat: 24g
- Saturated Fat: 13g
- Unsaturated Fat: 8g
- Trans Fat: 0.5g
- Carbohydrates: 50g
- Fiber: 2g
- Protein: 5g
- Cholesterol: 70mg
Keywords: Brownie Refrigerator Cake, layered dessert, chocolate pudding dessert, cream cheese cake, no-bake pudding cake
