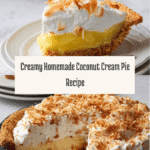
The Best Coconut Cream Pie Recipe
Introduction
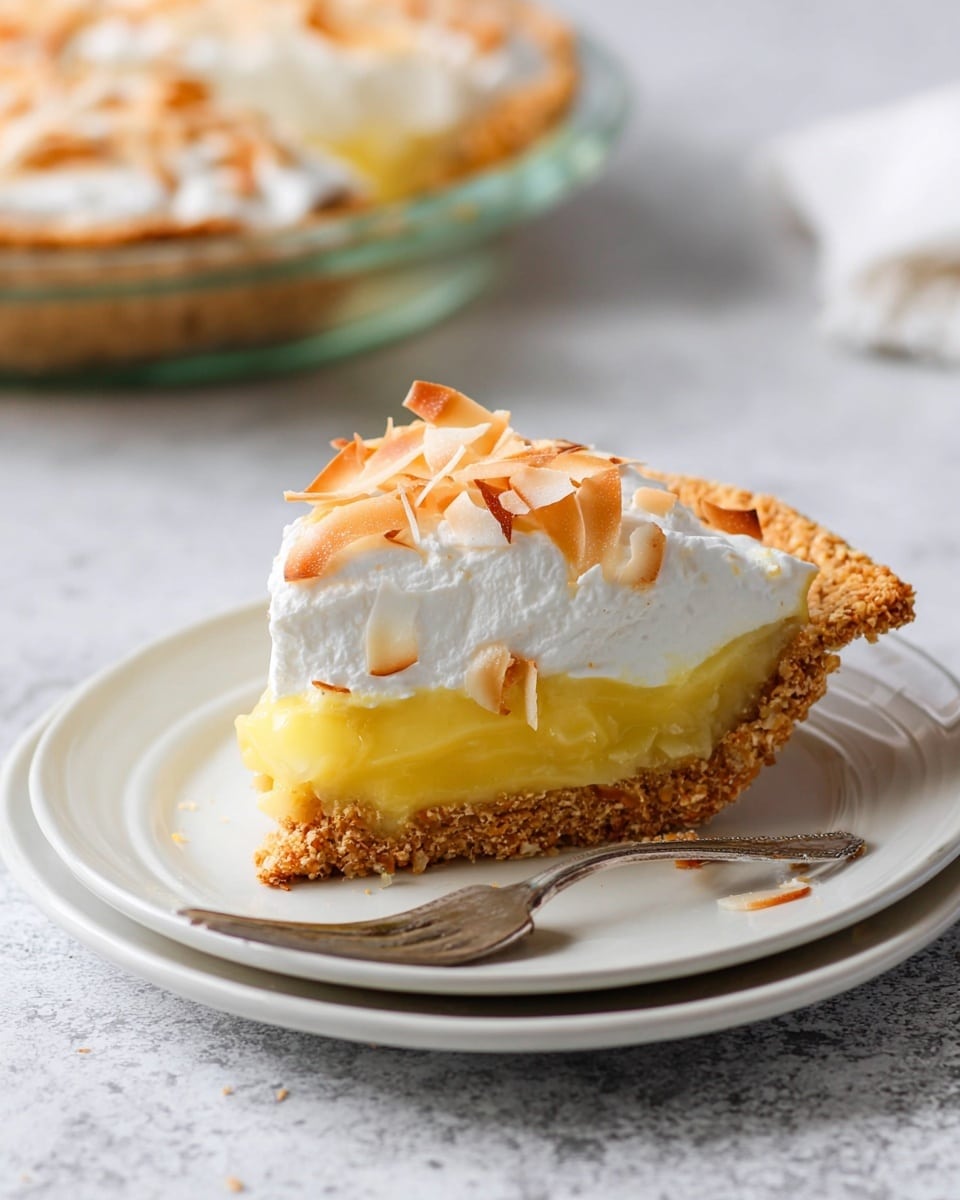
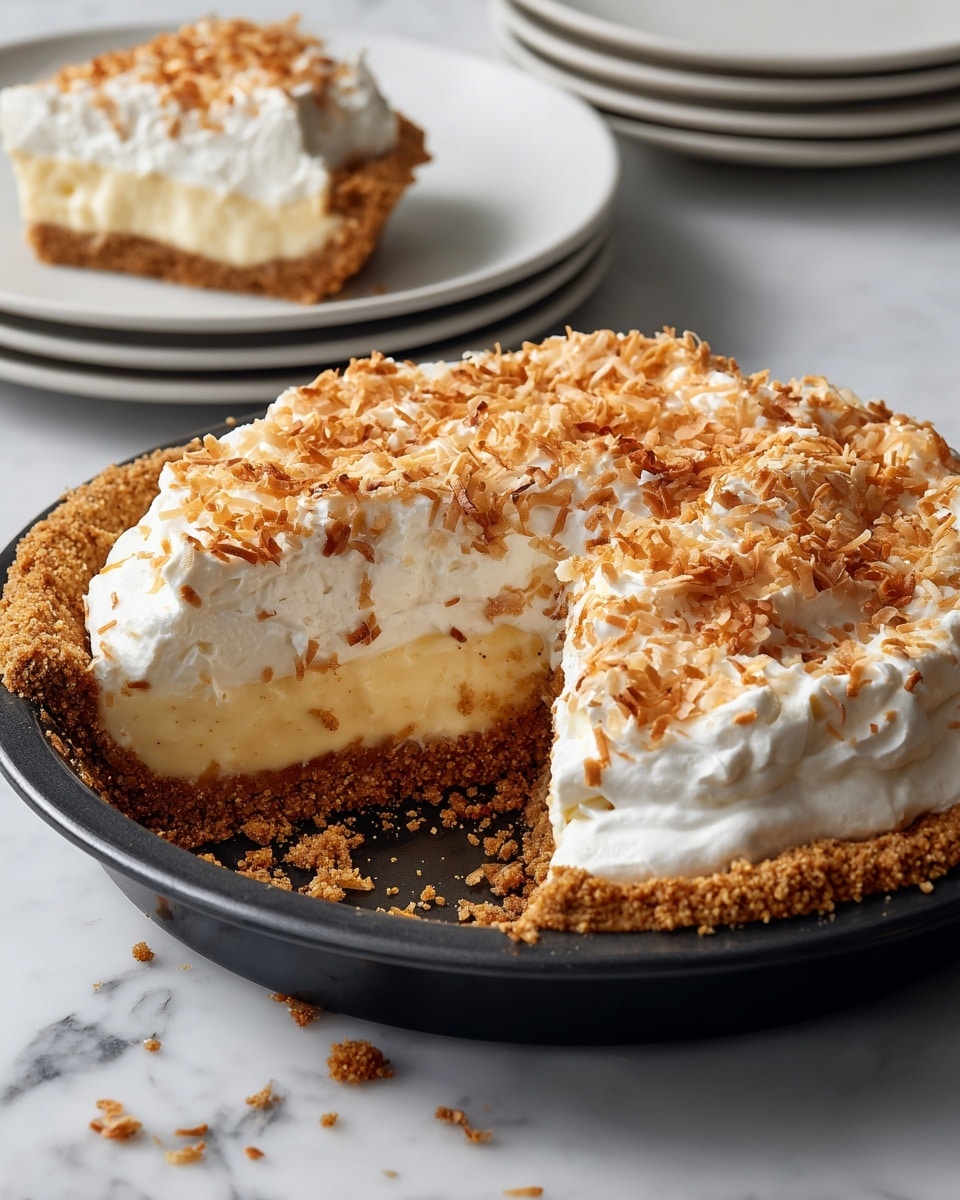
Coconut Cream Pie is a luscious dessert that combines a creamy coconut filling with a flaky pie crust. Rich, smooth, and perfectly sweet, this pie is a delightful treat for any occasion.
Ingredients
- One 9-inch homemade pie crust or pre-made crust
- One 13.5 fl oz can coconut milk
- Half and Half – enough to make 3 cups combined with the coconut milk (about 1 1/2 cups)
- 4 egg yolks, beaten slightly
- 3/4 cup white sugar
- 1/3 cup corn starch
- 1/4 teaspoon salt
- 1 tablespoon butter
- 2 teaspoons vanilla extract
- 1 1/2 cups shredded sweetened coconut
Instructions
- Step 1: Place the whole can of coconut milk into a large measuring cup. It will measure a little over 1 1/2 cups. Pour the Half and Half into the same measuring cup on top of the coconut milk until you reach the 3-cup measurement. Stir to combine the half and half with the coconut milk.
- Step 2: Pour the coconut and half and half mixture into a medium-sized heavy metal saucepan. Add the beaten egg yolks, sugar, salt, and corn starch to the pan. Whisk everything together to combine.
- Step 3: Turn your burner to low heat and place the pan on it. Slowly whisk the mixture continuously. This process can take up to 15 minutes for the mixture to thicken. Do not increase the heat to speed this up. You will notice slight resistance to the whisk as it thickens. Stay attentive, as the thickening will happen quickly once it starts.
- Step 4: Continue whisking until the pudding begins to boil and thick bubbles rise to the surface like little volcanoes. This stage is necessary for the pudding to set properly. Once boiling, whisk a little faster for one minute, then remove the pan from heat.
- Step 5: Stir in the vanilla extract, butter, and shredded coconut until well combined.
- Step 6: Pour the hot pudding into the pie crust, filling it to the brim. Cover the surface of the pudding with plastic wrap, pressing it gently onto the pudding to prevent a skin from forming. Refrigerate the pie for about 4 hours until set.
- Step 7: Before serving, top the pie with homemade whipped cream or a dollop of Cool Whip for added richness and texture.
Tips & Variations
- For extra coconut flavor, toast the shredded coconut lightly before adding it to the pudding.
- If you prefer a gluten-free crust, opt for a store-bought or homemade gluten-free pie crust.
- Use light coconut milk for a lighter dessert, but full-fat coconut milk will give a richer texture.
Storage
Store the pie covered in the refrigerator for up to 3 days. To reheat, let it come to room temperature and serve as is—this pie is best enjoyed chilled. Any leftover whipped cream should be stored separately and used within a day.
How to Serve
Serve this delicious recipe with your favorite sides.
FAQs
Can I use canned cream of coconut instead of coconut milk?
Cream of coconut is much sweeter and thicker than coconut milk, so it’s not recommended as a direct substitute. Stick to coconut milk for the best texture and flavor balance.
Can I make this pie ahead of time?
Yes, the pie can be made up to a day in advance and refrigerated until serving. Just add the whipped cream topping right before serving for the freshest taste.
PrintThe Best Coconut Cream Pie Recipe

A rich and creamy coconut cream pie featuring a homemade or pre-made pie crust filled with a smooth coconut custard pudding made from coconut milk, half and half, egg yolks, and shredded sweetened coconut. This classic dessert is topped with whipped cream, perfect for coconut lovers seeking an indulgent treat.
- Prep Time: 15 minutes
- Cook Time: 20 minutes
- Total Time: 4 hours 35 minutes
- Yield: 8 servings 1x
- Category: Dessert
- Method: Stovetop
- Cuisine: American
Ingredients
Pie Crust
- One 9-inch homemade pie crust or pre-made crust
Filling
- 1 (13.5 Fl Oz) can coconut milk
- Approximately 1 1/2 cups half and half (to make 3 cups combined with coconut milk)
- 4 egg yolks, beaten slightly
- 3/4 cup white sugar
- 1/3 cup corn starch
- 1/4 teaspoon salt
- 1 tablespoon butter
- 2 teaspoons vanilla extract
- 1 1/2 cups shredded sweetened coconut
Topping
- Homemade whipping cream or Cool Whip for garnish
Instructions
- Prepare the milk mixture: Place the entire can of coconut milk into a large measuring cup. It should measure just over 1 1/2 cups. Add half and half into the same cup until you reach 3 cups total. Stir well to combine the coconut milk and half and half.
- Combine filling ingredients and thicken: Pour the coconut/half and half mixture into a medium heavy saucepan. Add the beaten egg yolks, sugar, salt, and corn starch. Whisk thoroughly to combine all ingredients. Place the pan on low heat and continuously whisk slowly. This thickening process may take up to 15 minutes. Do not increase heat to speed up thickening to avoid curdling. The mixture will begin to thicken and resist the whisk as it cooks.
- Bring to boil and finish the custard: Continue whisking until the pudding mixture starts to boil, characterized by thick bubbles forming a ‘volcano’ effect on top. Once boiling, whisk briskly for an additional minute to ensure proper thickening. Remove the pan from heat and immediately stir in the vanilla extract, butter, and shredded sweetened coconut until well combined.
- Assemble and chill the pie: Pour the hot pudding filling into the prepared pie crust, filling it to the brim. Press a piece of plastic wrap directly onto the surface of the pudding to prevent a skin from forming as it cools. Refrigerate the pie for approximately 4 hours or until fully set.
- Serve: Once chilled and set, top the pie with homemade whipped cream or Cool Whip before serving for an extra creamy finish.
Notes
- Do not increase heat during cooking to avoid scrambling the eggs.
- Whisk continuously and patiently to achieve a smooth custard texture.
- Pressing plastic wrap onto the pudding surface prevents a skin from forming.
- For best flavor and texture, refrigerate the pie for at least 4 hours.
- You can toast the shredded coconut for added flavor before mixing into the custard if desired.
Keywords: Coconut Cream Pie, Coconut Pie, Cream Pie, Custard Pie, Homemade Pie, Coconut Dessert

