Perfectly Crispy Ground Beef Tacos with Fresh Toppings Recipe
Introduction
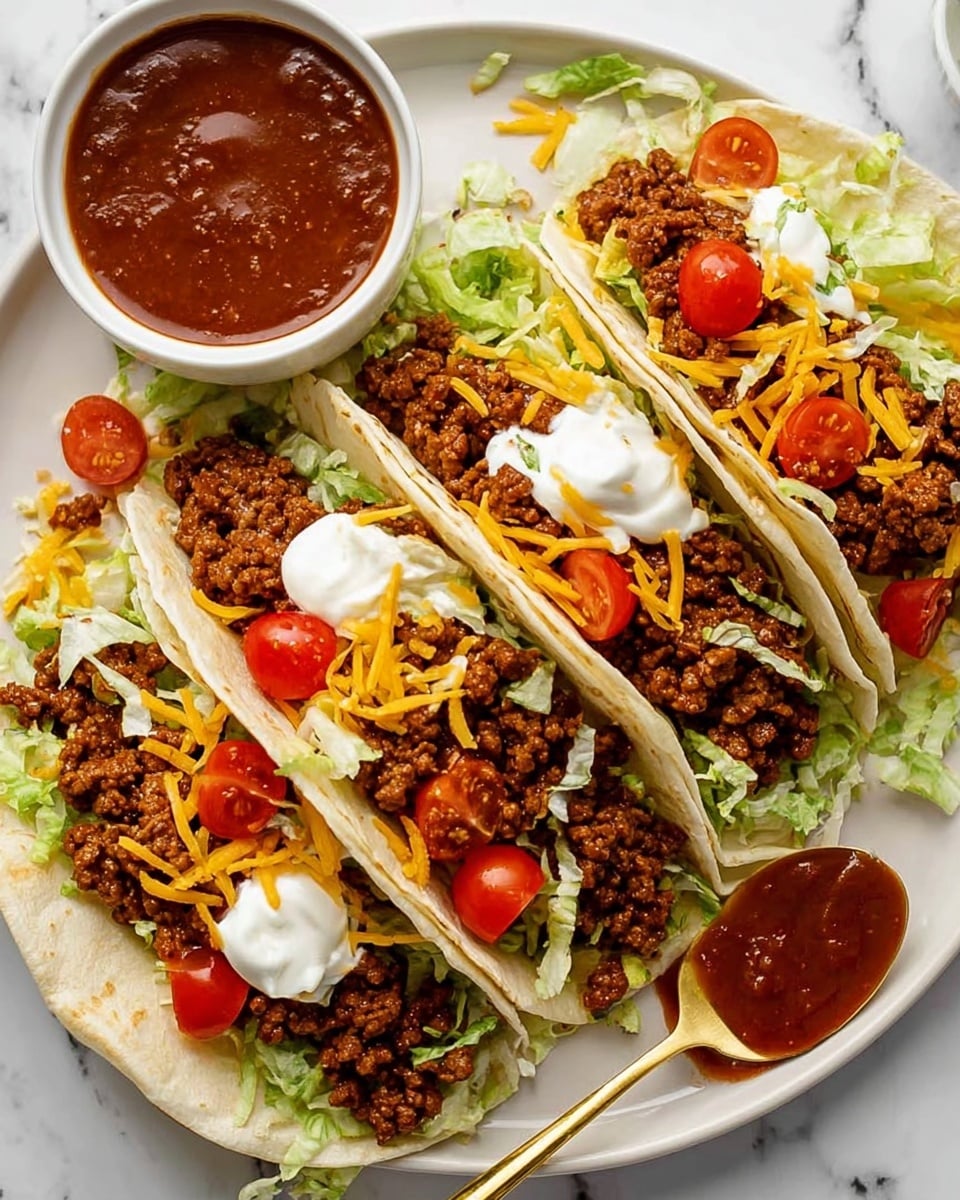
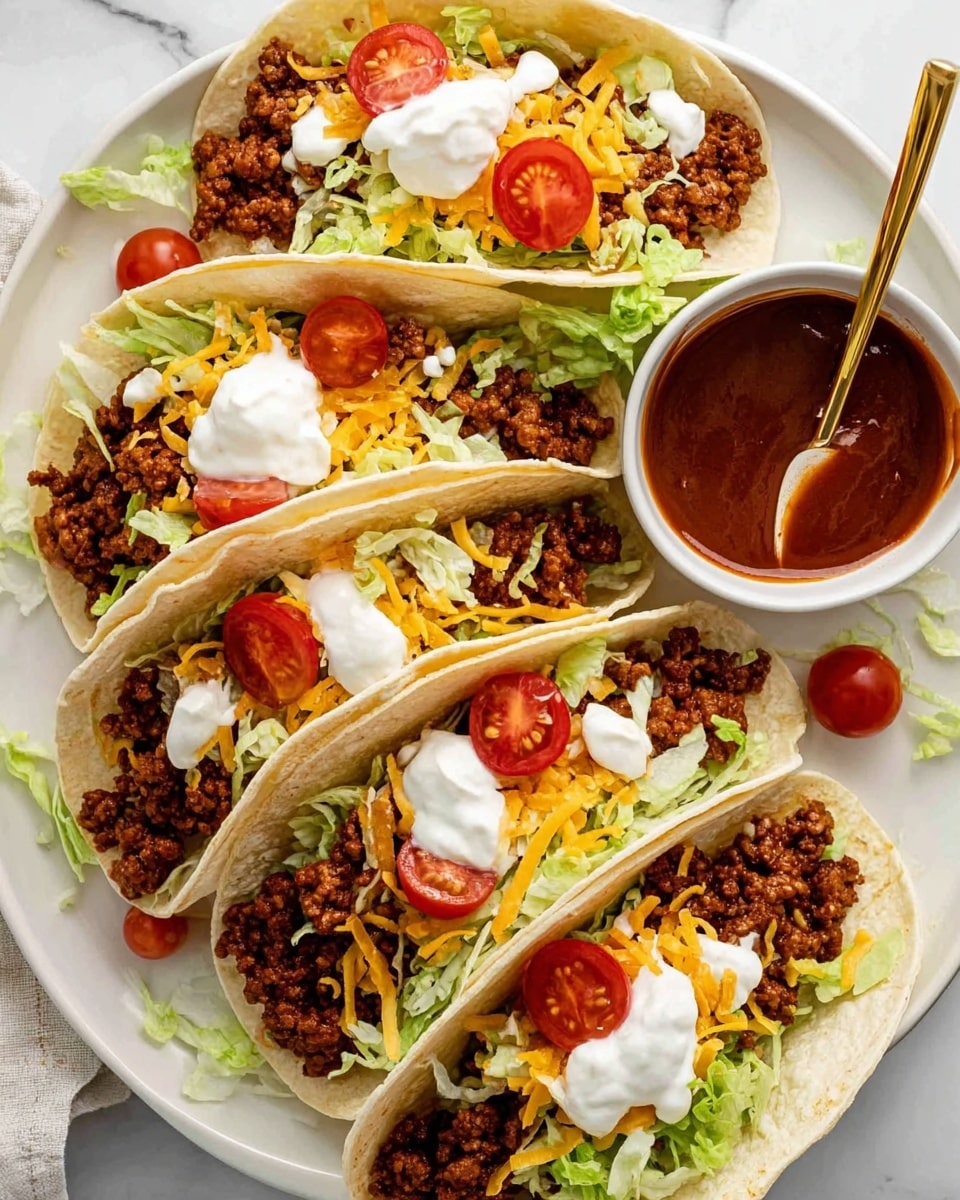
These ground beef tacos are a delicious homemade alternative to takeout, boasting a perfectly seasoned crust on the meat and fresh, vibrant toppings. Ready in just 20 minutes, they’re a quick and satisfying meal for any night of the week.
Ingredients
- 1 lb ground beef
- Taco seasoning
- Hard or soft taco shells
- Lettuce, chopped
- Tomato, diced
- Cheese, shredded
- Sour cream
Instructions
- Step 1: Brown the ground beef in a skillet over medium-high heat until fully cooked, then drain any excess grease.
- Step 2: Add the taco seasoning along with the amount of water indicated on the seasoning package. Stir well.
- Step 3: Reduce the heat to medium-low and let the mixture simmer until it thickens, about 5 minutes.
- Step 4: Warm the taco shells according to package instructions—either in the oven or microwave.
- Step 5: Prepare your toppings by chopping lettuce, dicing tomatoes, and shredding cheese.
- Step 6: Assemble the tacos by filling each shell with seasoned beef and topping with lettuce, tomato, cheese, and a dollop of sour cream.
Tips & Variations
- For extra flavor, add a squeeze of lime juice or some fresh cilantro on top of your tacos.
- Swap ground beef for ground turkey or chicken for a lighter option.
- Try adding black beans or corn for added texture and nutrition.
- Use soft corn tortillas instead of hard shells for a different texture.
Storage
Store leftover seasoned beef in an airtight container in the refrigerator for up to 3 days. Keep taco shells separate to avoid sogginess. Reheat the meat gently in a skillet or microwave before assembling your tacos again.
How to Serve
Serve this delicious recipe with your favorite sides.
FAQs
Can I make the taco meat ahead of time?
Yes, you can prepare the seasoned ground beef a day ahead and refrigerate it. Simply reheat it before serving.
How do I keep taco shells from getting soggy?
Keep the taco shells separate from the meat and toppings until just before eating. Warm shells right before assembly for best texture.
PrintPerfectly Crispy Ground Beef Tacos with Fresh Toppings Recipe

These Ground Beef Tacos deliver a homemade flavor that surpasses takeout, featuring perfectly seasoned and browned beef with a flavorful crust, complemented by fresh toppings and your choice of hard or soft taco shells.
- Prep Time: 10 minutes
- Cook Time: 20 minutes
- Total Time: 30 minutes
- Yield: 4 servings 1x
- Category: Main Dish
- Method: Stovetop
- Cuisine: Mexican
Ingredients
For the Beef:
- 1 lb ground beef
- 1 packet taco seasoning (approximately 2 tablespoons)
- 1/4 cup water
Toppings and Shells:
- Hard or soft taco shells (about 8 shells for 4 servings)
- 1 cup shredded lettuce
- 1 medium tomato, diced
- 1 cup shredded cheese (cheddar or blend)
- 1/2 cup sour cream
Instructions
- Brown the Meat: In a skillet over medium-high heat, add the ground beef. Cook, stirring occasionally, until the meat is fully browned and develops a flavorful crust, about 7-8 minutes. Drain excess fat from the pan to prevent greasiness.
- Add Seasoning and Water: Sprinkle the taco seasoning evenly over the browned beef. Pour in 1/4 cup water, stirring to combine thoroughly so the beef is evenly coated with seasoning.
- Simmer Until Thickened: Reduce the heat to medium-low and let the beef mixture simmer, stirring occasionally, until the sauce thickens and clings to the meat, about 5-7 minutes.
- Warm the Shells: While the beef simmers, warm your choice of hard or soft taco shells according to package instructions, either in the oven, microwave, or on a skillet.
- Prep Toppings: Wash and finely shred lettuce, dice the tomato, and shred the cheese if not pre-shredded. Arrange sour cream in a small bowl for serving.
- Assemble Tacos: Spoon the seasoned beef into each shell, then add desired toppings including lettuce, tomato, cheese, and a dollop of sour cream. Serve immediately for best flavor and texture.
Notes
- You can substitute ground turkey or chicken for a leaner option.
- If you prefer spicier tacos, add a pinch of cayenne pepper or chopped jalapeños with the seasoning.
- Leftover taco meat can be stored in the refrigerator for up to 3 days or frozen for up to 2 months.
- Warming taco shells properly helps prevent them from breaking while assembling.
- For gluten-free tacos, ensure taco shells are labeled gluten-free or use corn tortillas.
Keywords: ground beef tacos, taco recipe, easy tacos, Mexican tacos, seasoned beef tacos, weeknight dinner


