Peanut Butter Cup Dump Cake Delight Recipe
Introduction
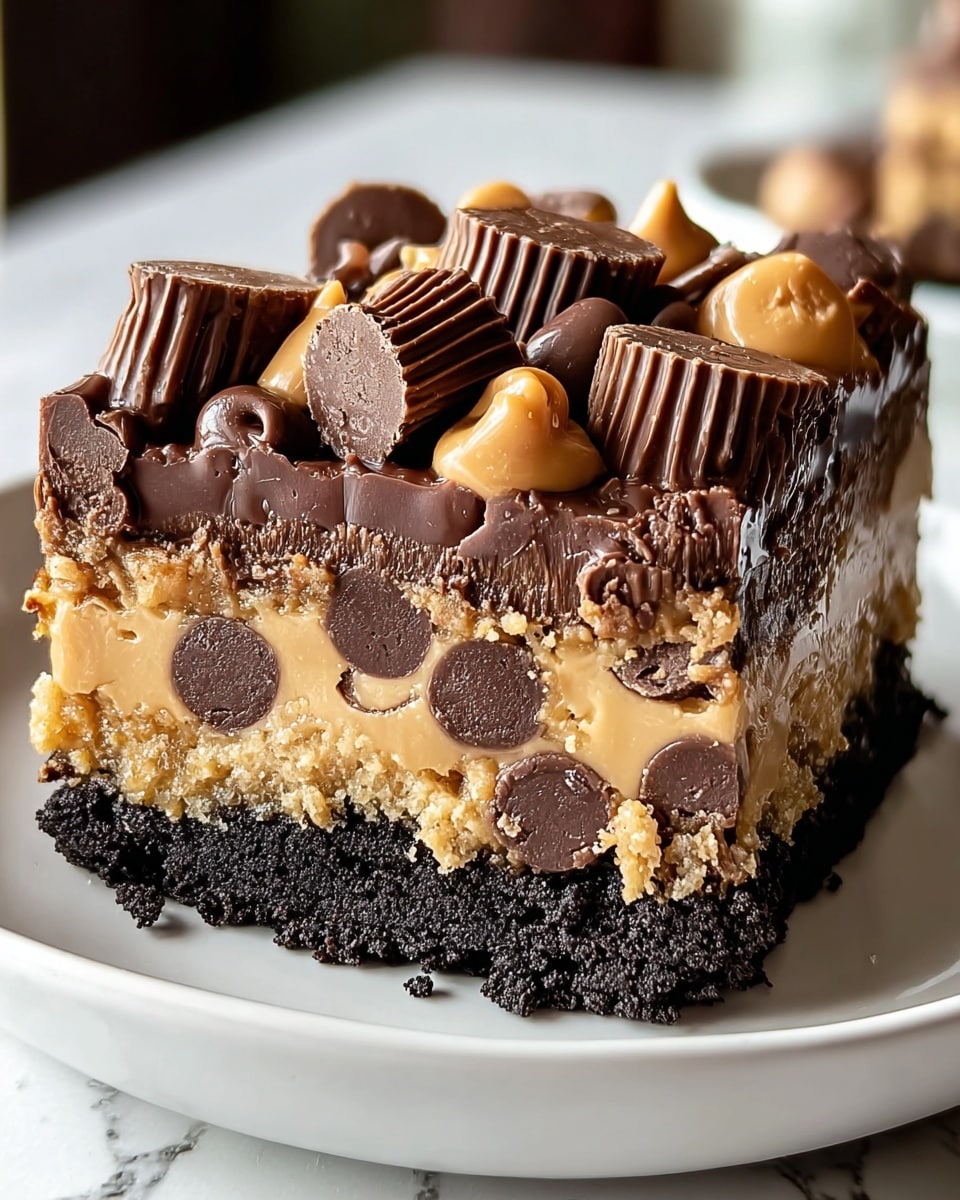
This 1 Bowl Peanut Butter Cup Dump Cake is a simple, indulgent dessert that combines rich chocolate and creamy peanut butter in one easy treat. With minimal prep and a deliciously gooey center, it’s perfect for satisfying your sweet tooth any time.
Ingredients
- 1 box chocolate cake mix
- 1/2 cup melted butter
- 1 1/2 cups milk
- 1 cup peanut butter
- 1 cup mini peanut butter cups
- 1/2 cup chocolate chips
Instructions
- Step 1: Preheat your oven to 350°F (175°C) and grease a 9×13-inch baking dish.
- Step 2: Spread the peanut butter evenly across the bottom of the prepared baking dish.
- Step 3: In a mixing bowl, whisk together the chocolate cake mix, melted butter, and milk until the batter is smooth.
- Step 4: Pour the batter over the peanut butter layer in the baking dish, spreading it gently to cover.
- Step 5: Sprinkle the mini peanut butter cups and chocolate chips evenly on top of the batter.
- Step 6: Bake for 35 to 40 minutes, or until a toothpick inserted in the center comes out clean.
- Step 7: Let the cake cool before serving to allow the layers to set.
Tips & Variations
- For extra gooeyness, try swirling some peanut butter into the cake batter before baking.
- Substitute mini peanut butter cups with chopped regular-sized peanut butter cups or Reese’s for a chunkier texture.
- Add a sprinkle of sea salt on top before baking to enhance the chocolate and peanut butter flavors.
- Use creamy or chunky peanut butter based on your preference for texture.
Storage
Store leftover cake in an airtight container at room temperature for up to 2 days, or refrigerate for up to 5 days. Reheat individual portions in the microwave for about 15-20 seconds for a warm, melty treat.
How to Serve
Serve this delicious recipe with your favorite sides.
FAQs
Can I use natural peanut butter for this recipe?
Yes, natural peanut butter works well. Just make sure it’s well stirred before spreading, as natural peanut butter tends to separate.
Do I need to refrigerate the cake?
Refrigeration is optional but recommended if you want to keep it fresh longer. It also helps the cake hold its shape if your kitchen is warm.
PrintPeanut Butter Cup Dump Cake Delight Recipe

This Peanut Butter Cup Dump Cake Delight is a luscious, easy-to-make dessert combining the rich flavors of chocolate cake mix with creamy peanut butter and chocolate chips. Perfect for peanut butter lovers, it boasts a moist texture and a delightful mix of chocolatey and nutty flavors, baked effortlessly in one bowl.
- Prep Time: 10 minutes
- Cook Time: 35 minutes
- Total Time: 45 minutes
- Yield: 12 servings 1x
- Category: Dessert
- Method: Baking
- Cuisine: American
Ingredients
Base and Wet Ingredients
- 1 box chocolate cake mix
- 1/2 cup melted butter
- 1 1/2 cups milk
Peanut Butter Layer and Toppings
- 1 cup peanut butter
- 1 cup mini peanut butter cups
- 1/2 cup chocolate chips
Instructions
- Preheat Oven: Preheat your oven to 350°F (175°C) to ensure it’s ready for baking your dump cake.
- Prepare Baking Dish: Grease a 9×13-inch baking dish well to prevent sticking and for easy cleanup.
- Spread Peanut Butter: Evenly spread 1 cup of peanut butter across the bottom of the greased baking dish, creating a rich, creamy base layer.
- Mix Cake Batter: In a mixing bowl, whisk together the chocolate cake mix, melted butter, and milk until the batter is smooth and fully combined.
- Pour Batter: Carefully pour the chocolate cake batter over the peanut butter layer in the dish, spreading it evenly.
- Add Toppings: Sprinkle the mini peanut butter cups and chocolate chips evenly over the top of the batter for extra bursts of chocolate and peanut butter flavor.
- Bake: Place the dish in the preheated oven and bake for 35–40 minutes, or until a toothpick inserted into the center comes out clean, indicating doneness.
- Cool and Serve: Allow the cake to cool before serving to let the layers set and to enjoy the full flavor and texture of the dessert.
Notes
- Use smooth or crunchy peanut butter based on your preference, but smooth peanut butter will blend more evenly.
- For extra indulgence, serve with a scoop of vanilla ice cream or a drizzle of chocolate sauce.
- You can substitute mini peanut butter cups with chopped regular-sized cups if mini ones are unavailable.
- Be careful not to overbake to keep the cake moist and tender.
- This recipe works well for potlucks or quick gatherings as it requires minimal prep and one bowl.
Keywords: peanut butter cup dump cake, chocolate peanut butter cake, easy dump cake, chocolate dessert, peanut butter dessert

