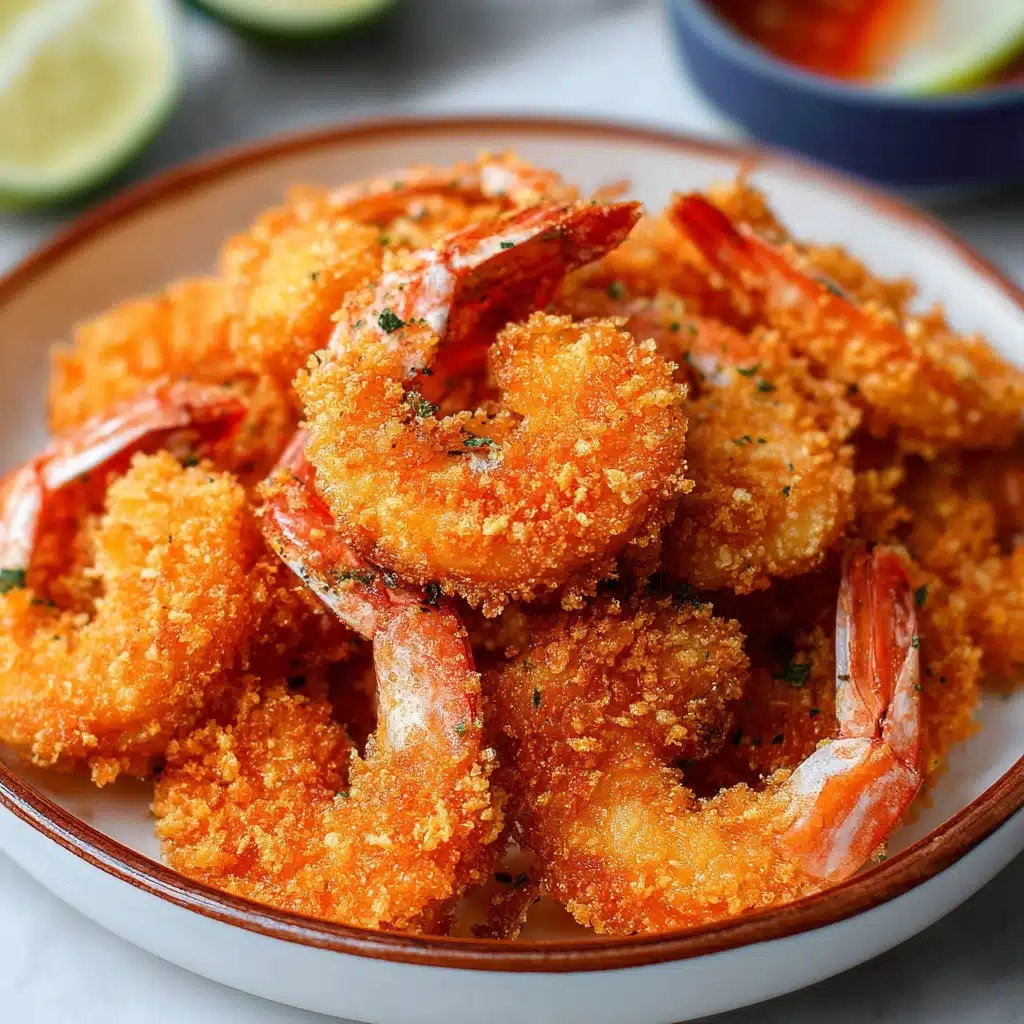
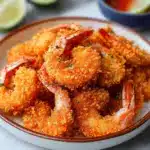
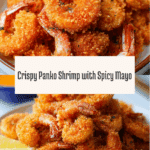
Panko Shrimp Recipe
If you love crispy, golden bites with an irresistible crunch and juicy seafood at the center, you’re in for a treat with this Panko Shrimp recipe. These jumbo shrimp are coated in ultra-light Japanese panko breadcrumbs, fried to perfection, and served hot with a zingy spicy mayo sauce. It’s a dish that brings together the absolute best parts of snack food and fine-dining seafood—deliciously easy to make at home, but fancy enough to impress at any table. From busy weeknights to festive gatherings, panko shrimp never fail to disappear in minutes.
Ingredients You’ll Need
Great Panko Shrimp begins with just a handful of well-chosen basics. Each ingredient plays a key role in delivering the irresistibly crunchy coating, tender shrimp inside, and punchy dipping sauce that make this dish so addictive.
- Jumbo Shrimp: Choose large shrimp for maximum juiciness and satisfying bites—peel and devein, leaving tails on for style and easier eating if you like.
- Egg: A single beaten egg gives the perfect sticky base so the breadcrumbs hold tight during frying.
- Panko Breadcrumbs: The secret to that ultra-light, shattering crunch; don’t substitute with regular breadcrumbs.
- Vegetable Oil: Go for a neutral oil like canola or sunflower, as it lets the flavor of the shrimp shine and supports a high fry temperature.
- Potato Starch (or Cornstarch): Helps create an even, crisp base layer and locks in the shrimp’s moisture.
- All-Purpose Flour: Blending with starch ensures the right texture for dredging.
- Salt: Seasoning at every stage makes all the flavor pop.
- Garlic Powder (or Onion Powder): Adds a subtle savory boost without overpowering the shrimp.
- Black Pepper: Freshly ground pepper offers a gentle heat and complexity.
- Japanese Mayonnaise: Brings creamy richness and a touch of umami to the dipping sauce.
- Sriracha Sauce: Delivers that essential spicy kick to complement the crunchy shrimp.
How to Make Panko Shrimp
Step 1: Prep the Shrimp
Start by patting your shrimp dry with paper towels—this is more important than it seems. Moisture can stop your coating from sticking, so make sure they’re as dry as possible. If the shrimp are not yet peeled or deveined, do so now, leaving the tails on if you want a decorative touch or a handy handle for dipping later.
Step 2: Prepare the Flour Mixture
In a small bowl, combine the potato starch (or cornstarch), all-purpose flour, salt, garlic powder, and black pepper. This blend gives your shrimp a subtle layer of flavor and sets the stage for maximum crispiness once fried.
Step 3: Coat the Shrimp
Set up a simple breading station: one bowl with the flour mixture, a second with the beaten egg, and a third with the panko breadcrumbs. Coat each shrimp first in the flour blend, then dip it into the egg, and finally press it generously into the panko. Make sure every bit of the shrimp gets an even, clinging coating of those fluffy breadcrumbs—this is the secret to standout Panko Shrimp.
Step 4: Heat the Oil
Pour the vegetable oil into a deep, heavy-bottomed skillet or saucepan and heat over medium to medium-high. Wait until it reaches 350°F (175°C); this is the magic number for crisp results without greasy shrimp. If you have a thermometer, use it for best results—otherwise, a breadcrumb dropped in the oil should immediately bubble and rise to the surface.
Step 5: Fry the Shrimp
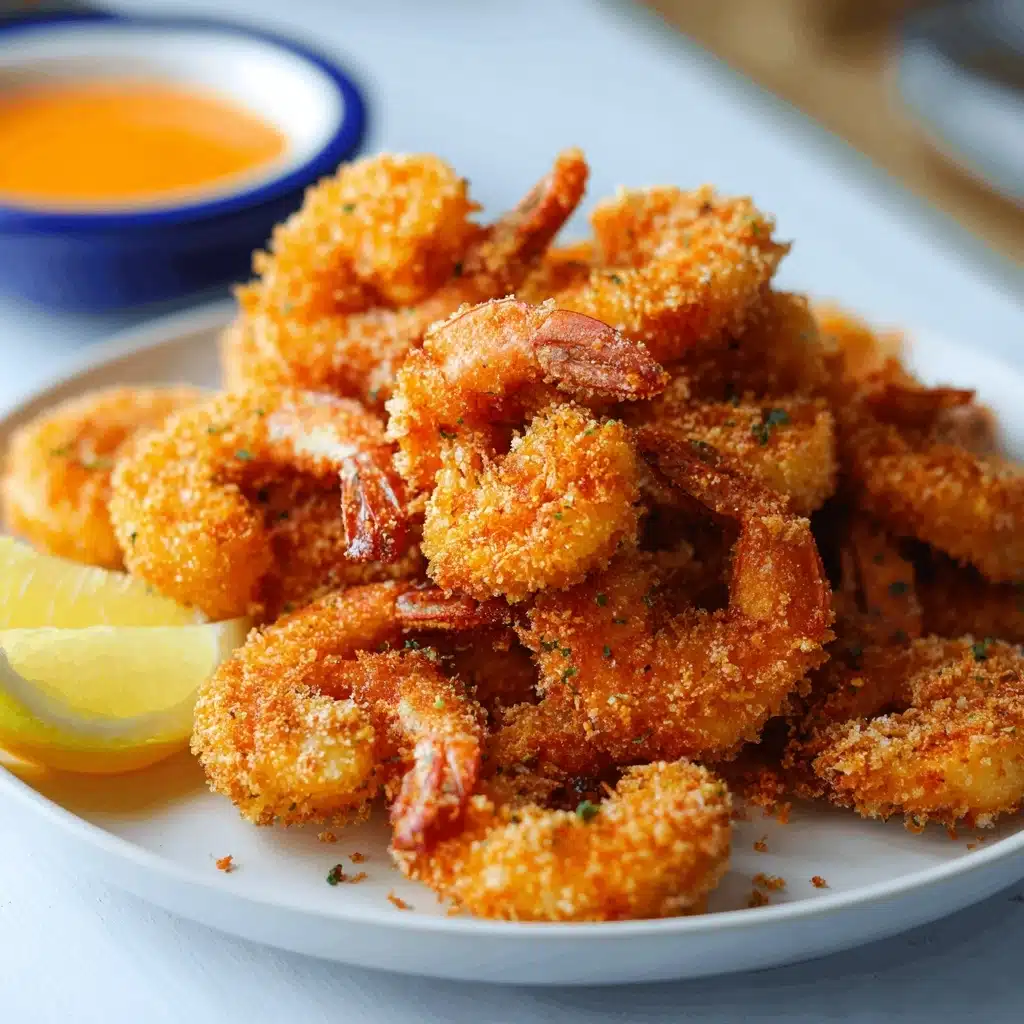
Carefully lower a few breaded shrimp into the hot oil, working in batches so the temperature doesn’t drop. Fry each batch for about 2 to 3 minutes per side, turning as needed, until they’re golden brown and cooked through. Transfer the cooked shrimp to a plate lined with paper towels to drain. The result: incredibly light and crunchy Panko Shrimp every time.
Step 6: Make the Dipping Sauce
While the shrimp cool slightly, whisk together Japanese mayonnaise and sriracha sauce in a small bowl until smooth and pink. This fiery, creamy dipping sauce is the perfect partner for hot, crispy shrimp.
Step 7: Serve
Arrange the panko shrimp on a platter with a side of the spicy mayo. Serve immediately while everything is at peak crunch!
How to Serve Panko Shrimp
Garnishes
Sprinkle your plate of panko shrimp with chopped fresh parsley or cilantro for a pop of color and a hint of freshness. Lemon wedges add a bright, citrusy finish—just a quick squeeze brings the flavors to life. A dash of toasted sesame seeds or thinly sliced scallions can also elevate the presentation, especially if you’re aiming for a restaurant-style spread.
Side Dishes
Panko shrimp pairs beautifully with simple sides like steamed jasmine rice, a crunchy Asian slaw, or quick pickled vegetables for balance. For a crowd, consider serving alongside crispy fries or a lightly dressed green salad. The richness of the shrimp is wonderfully offset by lighter, refreshing accompaniments.
Creative Ways to Present
Take your serving game up a notch by threading shrimp onto skewers for passed appetizers, plating them over small bowls of rice for individual servings, or arranging on mini-taco shells with a drizzle of extra sauce. Stack panko shrimp on a bamboo platter for a sushi-night vibe or serve as sliders in soft bao buns for a fun twist.
Make Ahead and Storage
Storing Leftovers
If you happen to have any leftover panko shrimp (good luck!), let them cool completely before storing so they don’t steam and get soggy. Place in a single layer in an airtight container and refrigerate up to two days. Store the dipping sauce separately.
Freezing
Panko shrimp freeze surprisingly well! Arrange cooled fried shrimp in a single layer on a baking sheet, freeze until solid, then transfer to a freezer bag or container. They’ll keep their texture for up to a month. When ready to enjoy, you can reheat straight from frozen, making snack time a breeze.
Reheating
For the best crunch, reheat panko shrimp in a 400°F (200°C) oven or air fryer for a few minutes until hot and crisp again. Avoid the microwave, which can make the coating soggy. The magic of panko breadcrumbs is that they revive beautifully when treated to a quick blast of heat.
FAQs
Can I use frozen shrimp for Panko Shrimp?
Absolutely! Just make sure to thaw them completely in the refrigerator and pat them very dry before breading for the crispiest results. Excess moisture is the enemy of crunch.
What’s the difference between panko and regular breadcrumbs?
Panko breadcrumbs are lighter, flakier, and larger than ordinary breadcrumbs, giving Panko Shrimp its signature airy crunch. They absorb less oil, resulting in a much crispier finish.
Can I bake instead of fry the shrimp?
Yes, you can bake panko shrimp on a wire rack set over a baking sheet at 425°F (220°C) for about 10-12 minutes, flipping halfway. While not quite as ultra-crispy as frying, they’re still seriously tasty and healthier too!
Is there a gluten-free option for this recipe?
You can easily make this recipe gluten-free by using gluten-free panko, cornstarch instead of flour, and double-checking your sauces. The shrimp will still come out beautifully crisp!
What else can I serve with the dipping sauce?
The spicy mayo is fantastic with just about anything fried—think tempura veggies, chicken tenders, or even as a spread in a fish sandwich. Once you’ve made it for your panko shrimp, you’ll want to put it on everything.
Final Thoughts
Making Panko Shrimp at home is so much easier than you might think, and the payoff is absolutely delicious. Whether you’re sharing them as a starter, serving as a snack, or building a whole meal around their irresistible crunch, give this recipe a try and watch everyone’s eyes light up. Dive in and let your kitchen smell like the best seafood spot in town!
PrintPanko Shrimp Recipe
Learn how to make irresistibly crispy Panko Shrimp at home with this easy recipe. These golden-fried shrimp are coated in crunchy panko breadcrumbs and served with a zesty sriracha mayo dipping sauce.
- Prep Time: 20 minutes
- Cook Time: 10 minutes
- Total Time: 30 minutes
- Yield: 4 servings 1x
- Category: Appetizer
- Method: Frying
- Cuisine: Japanese
- Diet: Gluten Free
Ingredients
For the Shrimp:
- ½ lb jumbo shrimp, peeled and deveined
- 1 large egg, beaten
- 1 ¼ cups panko breadcrumbs (or more as needed)
- 2 cups vegetable oil (or any neutral oil, for frying)
For the Flour Mixture:
- 2 tablespoons potato starch (or cornstarch)
- 2 tablespoons all-purpose flour
- ¼ teaspoon salt
- ¼ teaspoon garlic powder (or onion powder)
- ¼ teaspoon black pepper
For the Dipping Sauce:
- ¼ cup Japanese mayonnaise (or regular mayonnaise)
- 2 tablespoons sriracha sauce
Instructions
- Prep the shrimp: Pat the shrimp dry with paper towels. If not already done, peel and devein them, leaving the tails on if desired.
- Prepare the flour mixture: In a small bowl, mix potato starch, all-purpose flour, salt, garlic powder, and black pepper.
- Coat the shrimp: Dredge each shrimp in the flour mixture, then dip into the beaten egg, and finally coat with panko breadcrumbs. Press the panko onto the shrimp to ensure it sticks well.
- Heat the oil: In a deep skillet or saucepan, heat vegetable oil over medium heat until it reaches 350°F (175°C). Use a thermometer if available for accuracy.
- Fry the shrimp: Fry the shrimp in batches for 2–3 minutes per side or until golden brown and crispy. Do not overcrowd the pan. Remove and drain on a paper towel-lined plate.
- Make the dipping sauce: In a small bowl, whisk together Japanese mayo and sriracha until well combined.
- Serve: Serve the panko shrimp hot with the spicy mayo dipping sauce on the side.
Nutrition
- Serving Size: 1 serving
- Calories: 320
- Sugar: 2g
- Sodium: 480mg
- Fat: 18g
- Saturated Fat: 2g
- Unsaturated Fat: 14g
- Trans Fat: 0g
- Carbohydrates: 20g
- Fiber: 1g
- Protein: 20g
- Cholesterol: 175mg
Keywords: Panko Shrimp, Crispy Shrimp, Japanese Shrimp Recipe, Seafood Appetizer, Sriracha Mayo, Fried Shrimp