Japanese Rice Bread Recipe
Introduction
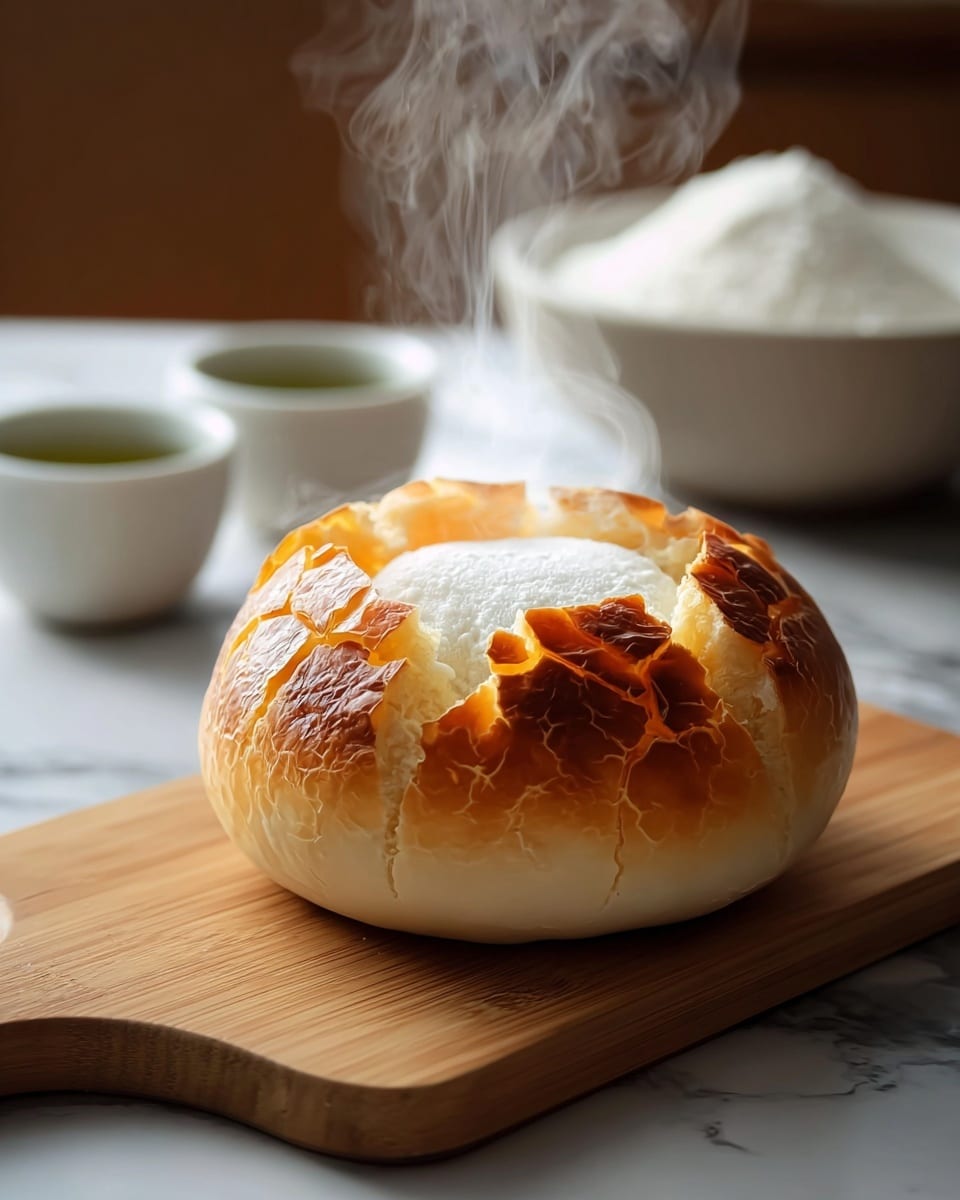
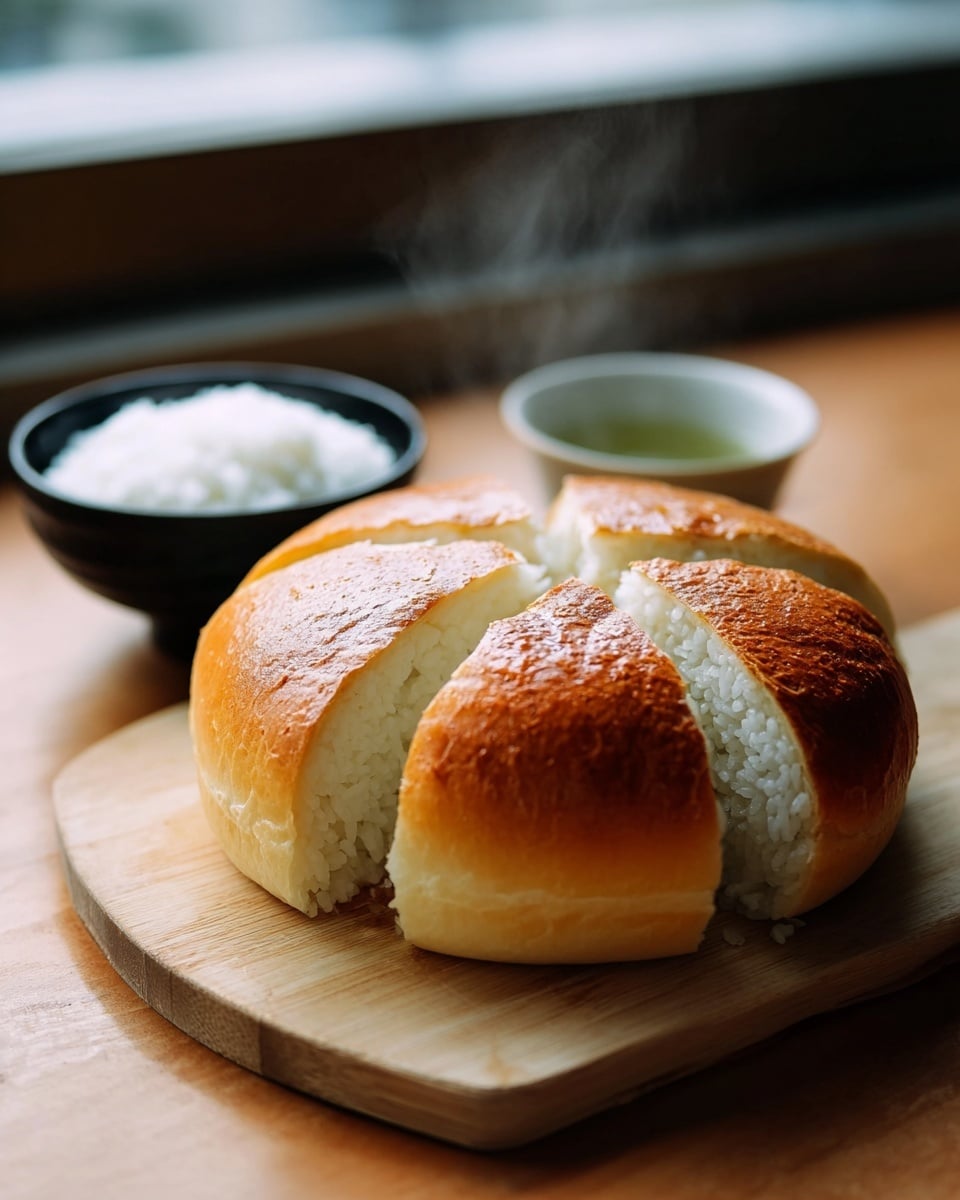
Japanese Rice Bread is a soft, tender loaf made without wheat flour, offering a unique texture and subtle flavor. Perfect for those seeking a gluten-free alternative, this bread combines rice flour with potato starch and yeast for a delightful homemade treat.
Ingredients
- 2 cups rice flour (preferably superfine white rice flour)
- ¼ cup potato starch (helps with binding and moisture)
- 2 tbsp sugar (optional, for light sweetness)
- 1 tsp salt
- 2 tsp instant yeast
- 1½ cups warm water (around 110°F / 43°C)
- 2 tbsp olive oil (or any neutral oil)
- Optional add-ins:
- 1 tsp apple cider vinegar (aids in texture)
- 2 tbsp milk powder (adds richness)
- 1 tsp xanthan gum (improves structure, especially without gluten)
- Sesame seeds or herbs for topping
Instructions
- Step 1: In a large mixing bowl, combine warm water, sugar, and instant yeast. Stir lightly and let it sit for 5–7 minutes until the mixture becomes foamy.
- Step 2: In a separate bowl, whisk together rice flour, potato starch, salt, and any optional dry ingredients like xanthan gum or milk powder.
- Step 3: Gradually add the dry mix into the yeast mixture. Stir using a hand mixer or wooden spoon until smooth. Add olive oil and mix again until the dough is thick but pourable.
- Step 4: Pour the dough into a greased loaf pan. Cover with a damp towel or plastic wrap. Let it rise in a warm place for about 45–60 minutes until it nearly doubles in size.
- Step 5: Preheat your oven to 375°F (190°C). Once preheated, place the loaf pan in the center of the oven and bake for 45–50 minutes or until golden brown on top and a toothpick inserted comes out clean.
- Step 6: Let the bread rest in the pan for 10 minutes before transferring it to a wire rack. Allow it to cool completely for the best texture.
Tips & Variations
- For a richer flavor, add 2 tablespoons of milk powder to the dry ingredients.
- Use apple cider vinegar to improve the bread’s texture and softness.
- Xanthan gum helps mimic gluten’s structure, which enhances rise and crumb in this gluten-free bread.
- Try sprinkling sesame seeds or chopped herbs on top before baking for extra flavor and visual appeal.
- If you prefer a slightly sweeter bread, increase sugar to 3 tablespoons or add a touch of honey.
Storage
Store the bread wrapped tightly in plastic wrap or in an airtight container at room temperature for up to 2 days. For longer storage, slice and freeze the bread for up to 1 month. Reheat slices in a toaster or oven for best texture.
How to Serve
Serve this delicious recipe with your favorite sides.
FAQs
Can I use regular wheat flour instead of rice flour?
This recipe is specifically designed for rice flour to create a soft, gluten-free bread. Using wheat flour will change the texture and baking times, so it’s best to use the recommended ingredients.
Why is the dough pourable instead of kneadable?
Rice flour lacks gluten, so the dough is thinner and more like a thick batter than traditional wheat dough. This is normal and helps create the bread’s characteristic soft texture.
PrintJapanese Rice Bread Recipe
This Japanese Rice Bread recipe offers a delightful gluten-free alternative to traditional wheat bread, featuring a soft and moist crumb thanks to the blend of rice flour and potato starch. The dough, enhanced with instant yeast and a touch of olive oil, is easy to prepare and yields a golden, tender loaf perfect for sandwiches or toast. Optional ingredients like apple cider vinegar, milk powder, and xanthan gum improve texture and richness, making this bread both delicious and uniquely satisfying.
- Prep Time: 15 minutes
- Cook Time: 45 minutes
- Total Time: 1 hour 15 minutes
- Yield: 1 loaf (8-10 slices) 1x
- Category: Bread
- Method: Baking
- Cuisine: Japanese
- Diet: Gluten Free
Ingredients
Main Ingredients
- 2 cups rice flour (preferably superfine white rice flour)
- 1/4 cup potato starch (helps with binding and moisture)
- 2 tbsp sugar (optional, for light sweetness)
- 1 tsp salt
- 2 tsp instant yeast
- 1½ cups warm water (around 110°F / 43°C)
- 2 tbsp olive oil (or any neutral oil)
Optional Add-ins
- 1 tsp apple cider vinegar (aids in texture)
- 2 tbsp milk powder (adds richness)
- 1 tsp xanthan gum (improves structure, especially without gluten)
- Sesame seeds or herbs for topping
Instructions
- Activate the yeast: In a large mixing bowl, combine warm water, sugar, and instant yeast. Stir lightly and allow the mixture to sit for 5-7 minutes until it becomes foamy, indicating the yeast is active and ready.
- Mix dry ingredients: In a separate bowl, whisk together the rice flour, potato starch, salt, and any optional dry ingredients like xanthan gum or milk powder to ensure even distribution and improved texture.
- Combine wet and dry mixtures: Gradually add the dry flour mixture into the yeast mixture, stirring with a hand mixer or wooden spoon until the batter is smooth. Then incorporate the olive oil, mixing until the dough reaches a thick but pourable consistency.
- First rise: Pour the batter into a greased loaf pan. Cover it with a damp towel or plastic wrap, and let it rise in a warm place for about 45–60 minutes, or until the dough nearly doubles in size.
- Bake the bread: Preheat the oven to 375°F (190°C). Place the loaf pan in the center of the oven and bake for 45–50 minutes. The bread is done when it’s golden brown on top and a toothpick inserted into the center comes out clean.
- Cool the bread: Let the bread rest in the pan for 10 minutes to set, then transfer it to a wire rack to cool completely. This cooling step ensures the best texture before slicing.
Notes
- You can sprinkle sesame seeds or herbs on top before baking for added flavor and visual appeal.
- The apple cider vinegar helps improve the bread’s texture but can be omitted if unavailable.
- Using instant yeast simplifies the process as it doesn’t require proofing in water at a specific temperature, though warm water still helps activation.
- For a dairy-free version, omit the milk powder or substitute with a non-dairy milk powder alternative.
- Allowing the bread to cool fully before slicing prevents it from becoming gummy and helps maintain its structure.
Keywords: Japanese rice bread, gluten-free bread, homemade rice flour bread, soft rice bread, gluten-free baking, yeast bread, Japanese cuisine


