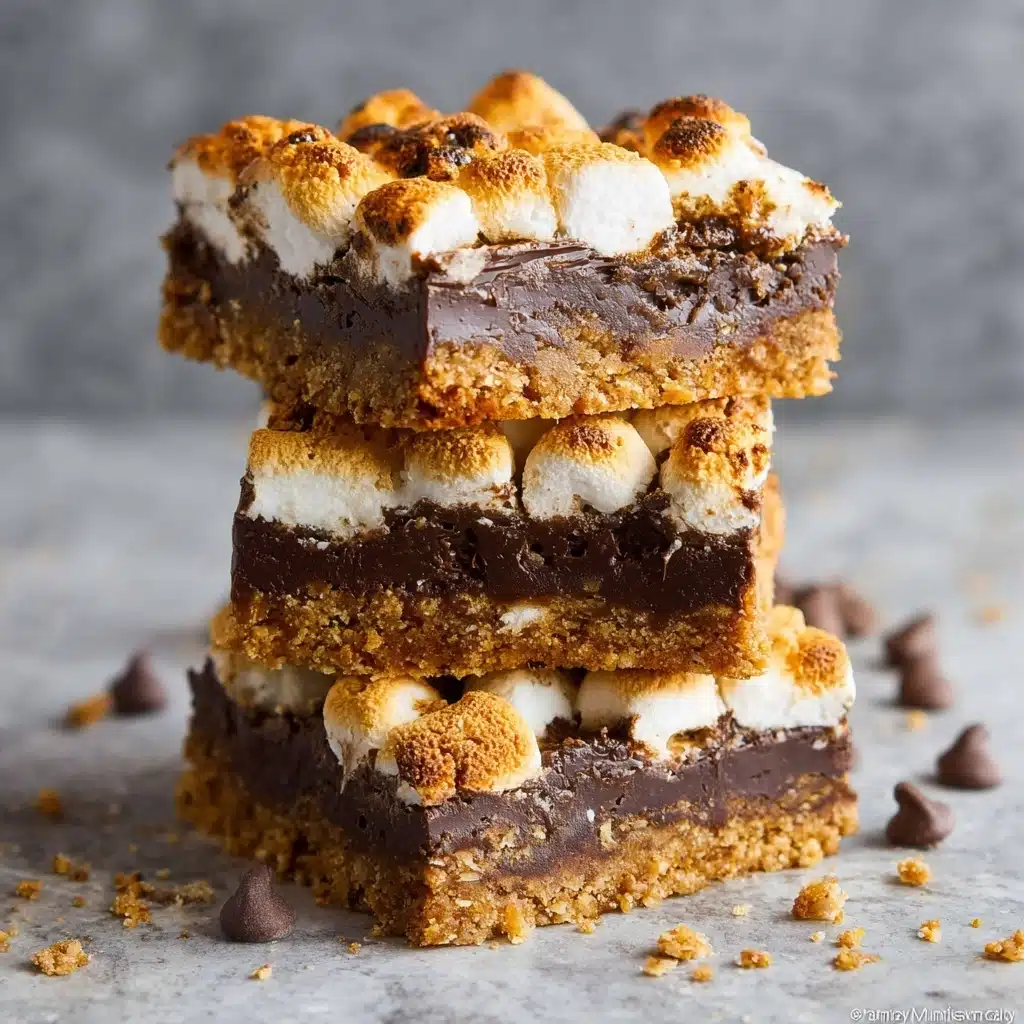
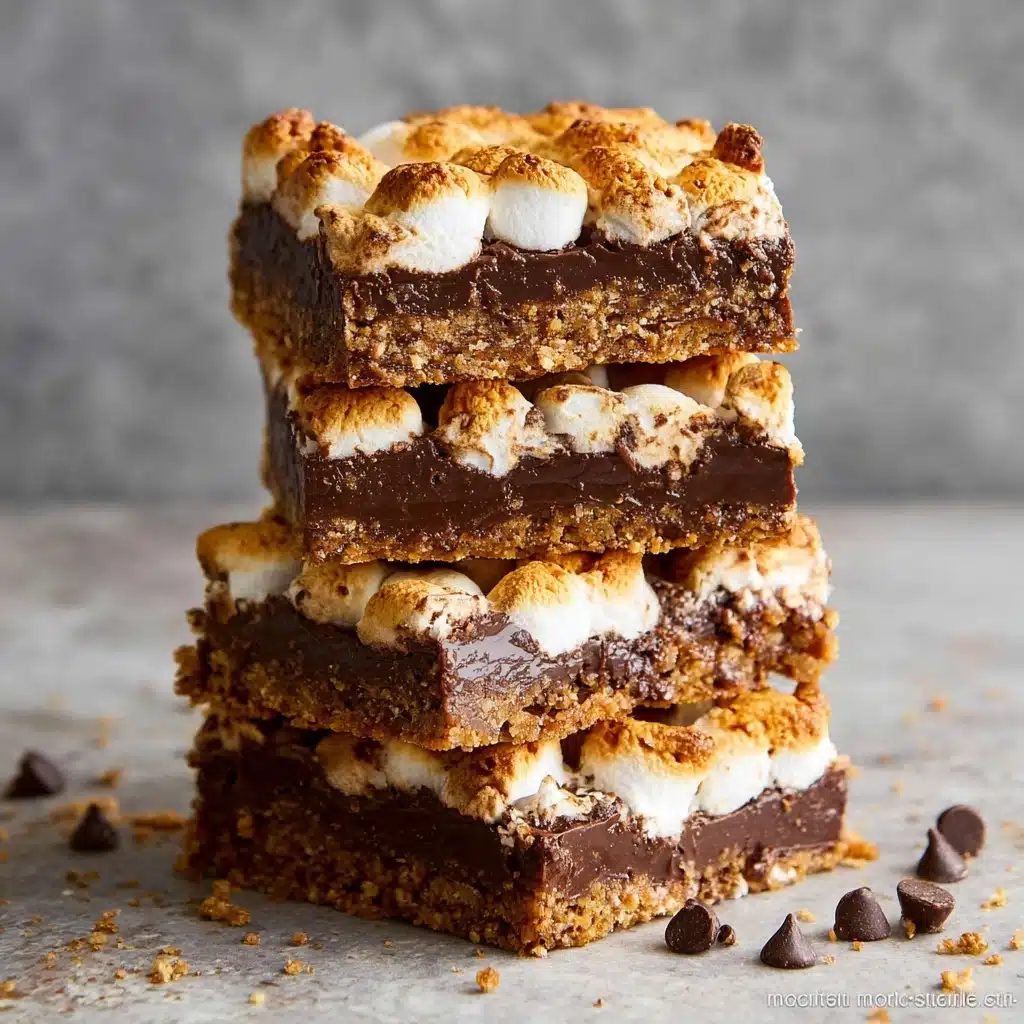
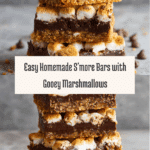
Easy Homemade S’more Bars Recipe
If you’re craving a nostalgic treat that brings together the best flavors of camping nights and cozy kitchen moments, you’re going to adore these Easy Homemade S’more Bars. Combining the classic crunch of graham crackers, the melty goodness of chocolate, and the pillowy softness of toasted marshmallows, this recipe transforms a beloved campfire favorite into a delightful dessert you can whip up anytime at home. Perfectly gooey, incredibly rich, and so simple to make, these bars are sure to become your new go-to for satisfying that sweet tooth in the most heartwarming way.
Ingredients You’ll Need
Gathering a handful of simple, everyday ingredients is all it takes to create these magic bars. Each item plays a key role in crafting the perfect balance of texture and flavor, ensuring every bite is a delicious adventure.
- Graham cracker crumbs: Provide a buttery, crunchy base that mimics the classic s’mores crust.
- Melted butter: Binds the crust together and adds richness for that perfect golden texture.
- Chocolate chips: Melt into silky pools of chocolatey goodness throughout the bars.
- Mini marshmallows: Toast to irresistible softness and golden brown tops that make the bars so inviting.
How to Make Easy Homemade S’more Bars
Step 1: Prepare your pan and base
Start by preheating your oven to 350°F and greasing a 9×13-inch baking pan with cooking spray. This ensures your bars won’t stick and slide right out after baking, saving you from any frustration and keeping the layers intact.
Step 2: Mix the crust
In a medium bowl, stir together the graham cracker crumbs and melted butter until fully combined. This mixture will form the sturdy yet crumbly foundation of your bars, delivering that signature graham cracker crunch in every bite.
Step 3: Press the crust into the pan
Transfer your crumb mixture into the prepared pan, pressing firmly on the bottom and up the sides. This helps create an even shell that supports the chocolate and marshmallow layers, holding everything perfectly together as the bars bake.
Step 4: Bake the crust
Pop the pan into the preheated oven and bake the crust for 8 minutes. This step sets the base, giving it a golden-brown color and a slight crispness that contrasts beautifully with the soft toppings.
Step 5: Add chocolate and marshmallows
Once the crust is out of the oven, sprinkle the entire surface with chocolate chips, then evenly layer mini marshmallows over the top. The heat from the oven will melt the chocolate and toast the marshmallows, creating that dreamy s’mores effect inside your bars.
Step 6: Final bake to perfection
Return the pan to the oven and bake for about 20 minutes, or until the marshmallows develop a lovely toastiness and golden brown edges. Keep an eye on them — that perfect toasty top is what truly elevates these bars.
Step 7: Cool and chill
After removing the bars from the oven, allow them to cool to room temperature before popping the whole pan into the fridge. This chilling step helps the bars firm up, making them easier to cut without losing that gooey charm.
Step 8: Cut and serve your Easy Homemade S’more Bars
Once properly chilled, slice the bars into squares and serve. Each piece delivers that blissful combo of textures and flavors you love, all in a neat, portable form.
How to Serve Easy Homemade S’more Bars
Garnishes
Elevate your Easy Homemade S’more Bars with a sprinkle of crushed graham crackers or a drizzle of caramel sauce for an extra touch of indulgence. A handful of sea salt flakes can also add a sophisticated contrast, balancing the sweetness and making every bite pop.
Side Dishes
These bars pair beautifully with cold milk for a classic combo, but why not try fresh berries alongside to brighten up the richness? Vanilla ice cream or a cup of brewed coffee complements the warm toasted marshmallow flavor wonderfully as well.
Creative Ways to Present
Try serving these bars fresh from the fridge on a rustic wooden board for a casual party vibe or stack them in colorful cupcake liners for a fun, portable dessert option at gatherings. You could even toast the marshmallow tops slightly more with a kitchen torch before serving to wow your guests visually and tastewise.
Make Ahead and Storage
Storing Leftovers
Your Easy Homemade S’more Bars will keep well in an airtight container at room temperature for up to two days. For best texture and freshness, storing them in the fridge is ideal, where they’ll last up to five days without losing their gooey charm.
Freezing
If you want to make these bars ahead of time, they freeze beautifully. Wrap bars individually or in portions with plastic wrap and place in a freezer-safe container for up to 2 months. Thaw them overnight in the fridge before enjoying.
Reheating
For that freshly baked feel, reheat bars briefly in a microwave for about 15 seconds or in a warm oven at 300°F for 5 to 7 minutes. This revives the melty chocolate and soft marshmallows while preserving the crisp crust underneath.
FAQs
Can I use regular marshmallows instead of mini marshmallows?
Yes! Regular marshmallows work just fine. You might want to chop them into smaller pieces to achieve an even layer and similar toasting effect as the minis.
Can I substitute chocolate chips with a chocolate bar?
Absolutely! Chop your favorite chocolate bar into chunks and sprinkle them over the crust. They will melt just as nicely and add a rustic touch to your bars.
Are these bars gluten-free?
Traditional graham cracker crumbs contain gluten, but you can use gluten-free graham crackers to make this treat safe for gluten-sensitive friends and family.
How do I make the crust less crumbly?
Ensure you mix enough melted butter into the graham crumbs to bind them well. Pressing the crust firmly into the pan before baking also helps keep it intact.
Can I add nuts or other toppings?
Yes! Feel free to mix in chopped nuts like pecans or walnuts for crunch, or sprinkle shredded coconut on top before baking for an extra layer of flavor and texture.
Final Thoughts
These Easy Homemade S’more Bars capture the essence of a campfire favorite with the comforting convenience of your kitchen. They’re perfect for sharing with friends, gifting, or just treating yourself to a moment of pure joy. Once you try making these bars, I promise they’ll become a beloved staple in your dessert rotation. So grab your ingredients, preheat that oven, and dive into the delicious gooeyness!
PrintEasy Homemade S’more Bars Recipe

These Easy Homemade S’more Bars combine a buttery graham cracker crust with a rich layer of melted chocolate chips and toasted mini marshmallows for a simple and delicious dessert that captures the nostalgic flavors of classic s’mores.
- Prep Time: 10 minutes
- Cook Time: 28 minutes
- Total Time: 38 minutes
- Yield: 12 bars 1x
- Category: Dessert
- Method: Baking
- Cuisine: American
- Diet: Vegetarian
Ingredients
Base
- 2 cups Graham cracker crumbs
- ½ cup Melted butter
Topping
- 4 cups Chocolate chips
- 1 package Mini marshmallows
Instructions
- Preheat the oven: Preheat your oven to 350°F (175°C) to ensure it is ready for baking the crust.
- Prepare the pan: Grease a 9×13 inch baking pan thoroughly with cooking spray to prevent sticking.
- Make the crust: In a mixing bowl, combine the graham cracker crumbs and melted butter thoroughly until the mixture resembles wet sand.
- Press crust into pan: Evenly spread and press the graham cracker mixture firmly along the bottom and up the sides of the prepared pan to form a compact crust.
- Bake the crust: Place the pan in the oven and bake for 8 minutes to set the crust partially.
- Add toppings: Remove the pan from the oven and evenly sprinkle the chocolate chips over the warm crust. Then, sprinkle the mini marshmallows evenly on top of the chocolate layer.
- Bake until golden: Return the pan to the oven and bake for 20 minutes or until the marshmallows have melted and turned a light golden brown.
- Cool and chill: Remove from the oven and allow the s’more bars to cool at room temperature, then place the pan in the refrigerator to chill and set completely for easier slicing.
- Serve: Once chilled, cut into bars and serve chilled or at room temperature for a gooey, delicious treat.
Notes
- You can substitute milk chocolate chips with semi-sweet or dark chocolate chips for a different flavor profile.
- Use jumbo marshmallows cut in halves for larger toasted marshmallow bits on top.
- For added texture, sprinkle crushed nuts such as pecans or walnuts on top before baking.
- Store leftover bars covered in the refrigerator for up to 4 days to keep them fresh and gooey.
Nutrition
- Serving Size: 1 bar (approx. 1/12 of recipe)
- Calories: 300
- Sugar: 25g
- Sodium: 110mg
- Fat: 15g
- Saturated Fat: 9g
- Unsaturated Fat: 6g
- Trans Fat: 0g
- Carbohydrates: 38g
- Fiber: 2g
- Protein: 3g
- Cholesterol: 20mg
Keywords: s’more bars, homemade s’mores, easy dessert bars, graham cracker dessert, chocolate marshmallow bars