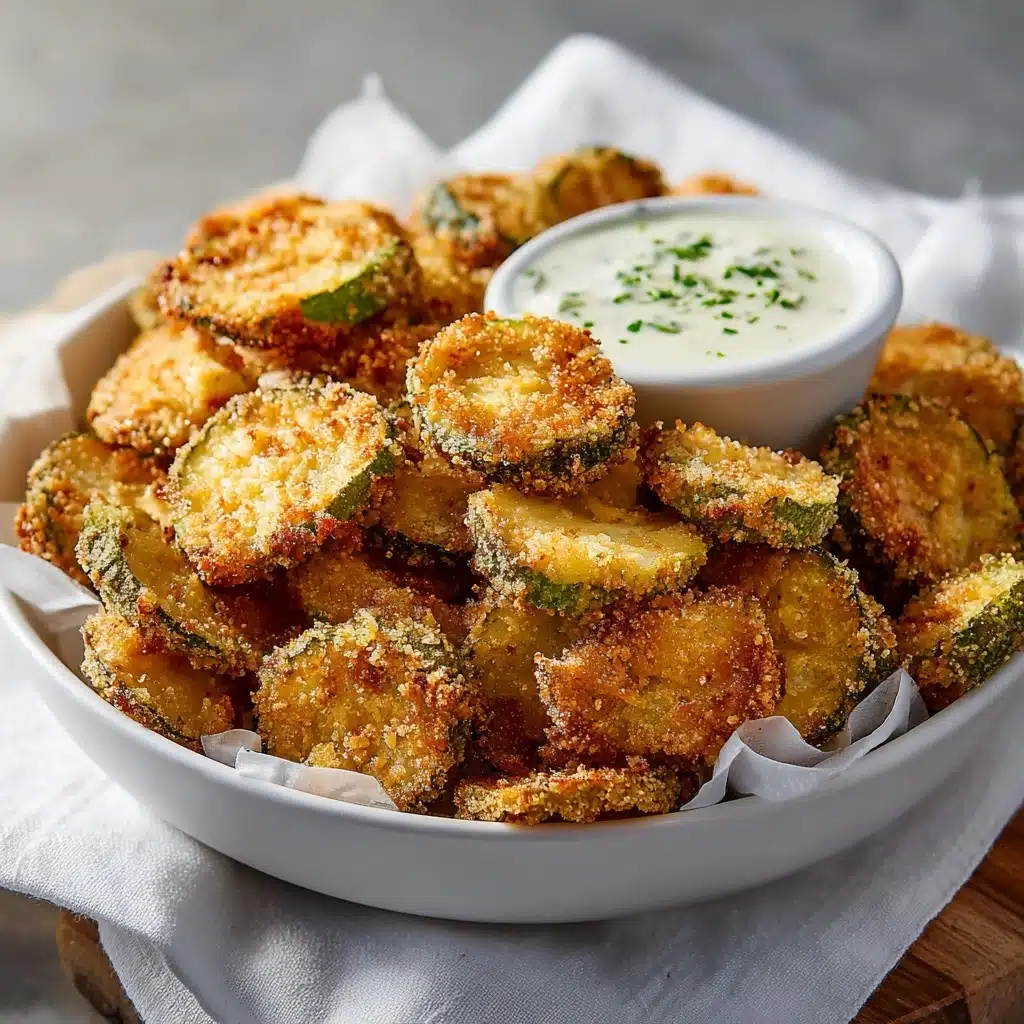
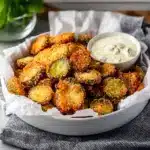
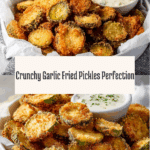
Crispy Fried Pickles Recipe
If you’re searching for the ultimate crunchy snack with a burst of tangy flavor, Crispy Fried Pickles are an absolute must-try. Imagine classic dill pickle slices wrapped in a golden, shatteringly crisp shell, each bite balancing savory, herby seasoning with the unmistakable zing of pickles. Whether you’re whipping up a fun appetizer for friends or adding a playful twist to your game day spread, these are addictively delicious. Trust me: once you try homemade Crispy Fried Pickles, there’s no turning back!

Ingredients You’ll Need
You’ll be delighted to know that each ingredient here plays a starring role. With just a few pantry staples and pickles, you’ll transform a humble jar into a plateful of irresistible snack perfection. Every component brings its own flavor, crunch, or color to help these Crispy Fried Pickles truly shine.
- Vegetable Oil: Choose this for frying because it won’t overwhelm the pickles and can take the heat needed for crispiness.
- Dill Pickle Slices (16 oz jar): Crisp, tangy, and vibrantly green, they’re the foundation of the dish—always opt for thick-cut if you can!
- All-Purpose Flour (½ cup): A critical base for the batter, helping everything stick and crisp up just right.
- Garlic Salt (2 tsp): Delivers a pop of savory, garlicky flavor that’s subtle but essential in every bite.
- Italian Seasoning (1 tsp): Adds an herby aroma, infusing the batter with delicious flavor complexity.
- Pepper (¼ tsp): Just a dash goes a long way, giving a gentle heat and fortifying the seasoning blend.
- Water (¾ cup): Makes the batter nice and smooth so it glides right onto each pickle slice.
- Panko Breadcrumbs (1½ cups): These Japanese-style breadcrumbs are key to that irresistible crunch—don’t substitute regular breadcrumbs if you want the full effect!
How to Make Crispy Fried Pickles
Step 1: Prepare the Frying Oil
Start by pouring about ½ inch of vegetable oil into your favorite heavy-bottomed frying pan. Place it over medium-high heat, and let it warm up until it reaches between 350 and 375°F. If you have a candy or deep-fry thermometer, this is the perfect time to use it—keeping your oil at the right temperature ensures your Crispy Fried Pickles don’t end up greasy or soggy.
Step 2: Prep the Pickles
Open your jar of dill pickles and drain the brine. Spread out the slices on a few layers of paper towel, then gently pat them dry. Don’t skip this part! Getting the pickles as dry as possible means the batter will adhere beautifully, and you’ll avoid that wild oil splattering when they hit the pan.
Step 3: Make the Batter
In a shallow mixing bowl, whisk together your all-purpose flour, garlic salt, Italian seasoning, and pepper until well incorporated. Slowly pour in the water as you whisk, ensuring a lump-free, silky-smooth batter. It should be thick enough to coat the pickles easily, but not so thick that it clumps.
Step 4: Set Up the Breading Station
Grab a separate shallow dish and fill it with panko breadcrumbs. Line up your workspace: first the batter bowl, then the panko dish, and finally a plate or tray to catch your breaded pickles before frying. This simple setup makes everything flow smoothly.
Step 5: Coat the Pickles
Working in batches, dip each dry pickle slice into the batter and let any excess drip off. Press it firmly into the panko, making sure both sides get an even jacket of crumbs. Lay the breaded pickles out on your plate—try not to eat them yet!
Step 6: Fry to Perfection
Carefully add a few breaded pickles to the hot oil, giving them room so they don’t crowd each other. Fry for about 1 to 2 minutes per side, watching for that gorgeous golden color. Move the finished Crispy Fried Pickles to a paper towel-lined plate to soak up any extra oil. Keep working in batches till all pickles are fried and gleaming!
How to Serve Crispy Fried Pickles
Garnishes
For a pop of freshness, sprinkle your finished Crispy Fried Pickles with a little chopped parsley or fresh dill. A dusting of smoked paprika adds color and a whisper of heat. And if you’re feeling indulgent, a little freshly grated Parm or a drizzle of ranch right before serving really takes these over the top!
Side Dishes
These pickles love company! Serve them alongside burgers, a basket of hot wings, or a pile of sweet potato fries. Their acidity and crunch cut through richer dishes, turning a simple meal into a party spread. Don’t forget dipping sauces—classic ranch, creamy blue cheese, or spicy sriracha-mayo are all big hits.
Creative Ways to Present
Pile your Crispy Fried Pickles high in a parchment-lined basket for a casual get-together, or serve them on a wooden board with ramekins of different dips for a stunning appetizer. For game day, stack them in a paper cone—kids and adults will both love grabbing and munching. You could even skewer a few to garnish bloody marys for the ultimate brunch upgrade!
Make Ahead and Storage
Storing Leftovers
If you find yourself with leftover Crispy Fried Pickles (it’s a rare occurrence, but it happens!), let them cool completely before placing them in an airtight container. Layering them between pieces of paper towel can help absorb excess moisture and keep them from getting soggy in the fridge. Enjoy within 2 to 3 days for the best crunch.
Freezing
Crispy Fried Pickles actually freeze better than you might expect! Lay cooled pickles out in a single layer on a baking sheet and freeze until solid, then transfer to a freezer-safe bag or container. They’ll keep up to two months. Don’t thaw before reheating, or they may lose their crispness.
Reheating
To bring back the crunch, skip the microwave and use an oven or air fryer. Spread the pickles on a baking sheet and reheat at 400°F for 8-10 minutes, or until hot and crispy. In the air fryer, a quick 5 minutes at 375°F is usually all it takes. Serve right away for maximum enjoyment!
FAQs
Can I use other types of pickles for this recipe?
Absolutely! While dill pickle slices are a classic, you can experiment with bread-and-butter or spicy pickles for a sweeter or bolder twist. Just make sure to dry them thoroughly for the best results.
What oil is best for frying Crispy Fried Pickles?
Vegetable oil is my go-to because of its high smoke point and clean taste. Other good choices include canola or peanut oil—just avoid olive oil, which can burn at high frying temperatures.
Are Crispy Fried Pickles gluten-free?
Not as written, but you can swap the all-purpose flour and panko for your favorite gluten-free blends, and they’ll still come out delightfully crispy!
What’s the secret to ultra-crispy results?
Dry the pickles really well before battering, make sure your oil is hot but not smoking, and use panko instead of regular breadcrumbs. These three little tricks transform ordinary pickles into amazing Crispy Fried Pickles every time.
Can I make them in an air fryer instead?
You sure can! Prep and bread the pickles as directed, then spritz them lightly with oil and air fry at 400°F for about 8 minutes, flipping halfway through. They’ll be crisp, golden, and slightly lighter than the deep-fried version.
Final Thoughts
Few things in life bring as much joy as sharing a plate of hot, Crispy Fried Pickles with family or friends. Whether you serve them on a sunny afternoon or at your next party, I promise they’ll be the star of the table. Don’t wait—give these a try and make your own kitchen the happiest place on earth!
PrintCrispy Fried Pickles Recipe
Learn how to make delicious Crispy Fried Pickles at home with this easy recipe. These tangy pickle slices are coated in a savory batter and crispy panko breadcrumbs, resulting in a perfect appetizer or snack.
- Prep Time: 15 minutes
- Cook Time: 10 minutes
- Total Time: 25 minutes
- Yield: 4 servings
- Category: Appetizer
- Method: Frying
- Cuisine: American
- Diet: Vegetarian
Ingredients
Vegetable Oil
- Perfect for frying because of its high smoke point and neutral flavor.
Dill Pickle Slices (16 oz jar)
- Their tanginess complements the savory breading beautifully.
All-Purpose Flour (½ cup)
- Forms the base of the batter and helps the breading stick.
Garlic Salt (2 tsp)
- Adds a savory, garlicky depth to the batter.
Italian Seasoning (1 tsp)
- A blend of herbs that gives the pickles a subtle aromatic kick.
Pepper (¼ tsp)
- For a touch of heat and balance.
Water (¾ cup)
- Ensures the batter is smooth and easy to coat.
Panko Breadcrumbs (1½ cups)
- Creates a light, crispy coating.
Instructions
- Prepare the Frying Oil – Start by filling a frying pan with about ½ inch of vegetable oil. Heat the oil over medium-high heat until it reaches a temperature of 350–375°F. Use a candy or deep-fry thermometer to ensure accuracy; maintaining the right temperature is key to crispy, non-greasy pickles.
- Prep the Pickles – Drain the jar of dill pickles and spread the slices on paper towels. Pat them dry thoroughly to remove excess moisture. This step is crucial, as any leftover juice can cause the oil to splatter and may affect the crispiness of the coating.
- Make the Batter – In a shallow bowl, whisk together all-purpose flour, garlic salt, Italian seasoning, pepper, and water until you achieve a smooth, lump-free batter.
- Set Up the Breading Station – Place panko breadcrumbs in a separate shallow dish. Arrange your breading station in this order: batter bowl, breadcrumbs dish, and a plate for the coated pickles.
- Coat the Pickles – Dip each pickle slice into the batter, then press it into the panko breadcrumbs, ensuring all sides are coated.
- Fry to Perfection – Fry the coated pickles in hot oil for 1–2 minutes on each side until golden brown and crisp. Drain on paper towels and repeat with remaining pickles.
Nutrition
- Serving Size: 1 serving
- Calories: 240
- Sugar: 2g
- Sodium: 780mg
- Fat: 14g
- Saturated Fat: 2g
- Unsaturated Fat: 10g
- Trans Fat: 0g
- Carbohydrates: 26g
- Fiber: 2g
- Protein: 4g
- Cholesterol: 0mg
Keywords: Crispy Fried Pickles, Fried Pickles Recipe, Appetizer, Snack, Pickle Recipe