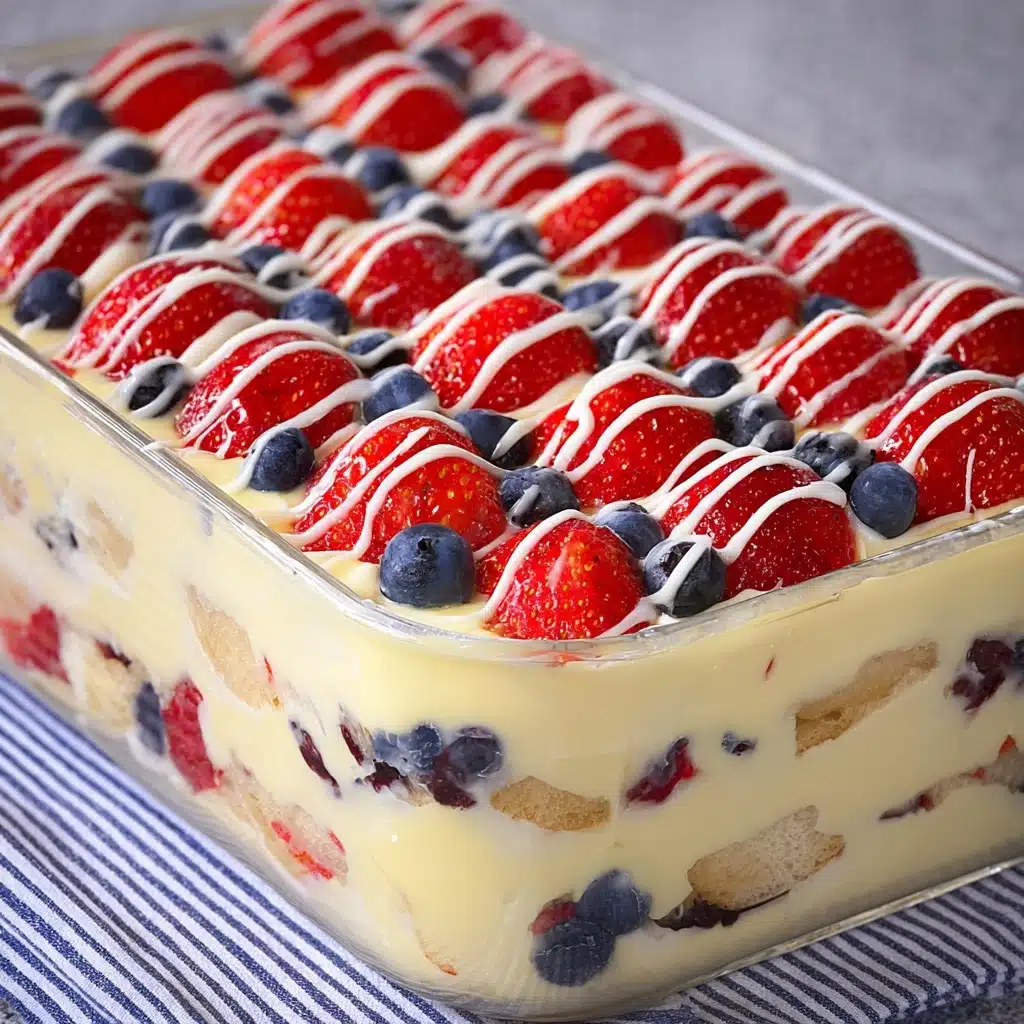
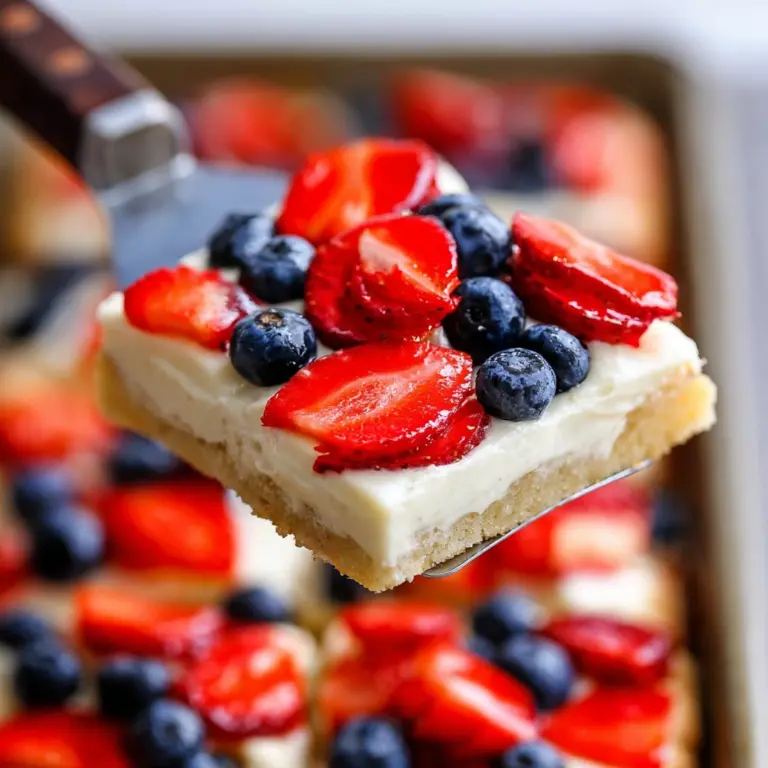
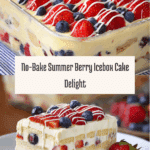
No Bake Summer Berry Icebox Cake Recipe
If you’re searching for the ultimate summertime dessert that’s both vibrant and irresistibly easy, this No Bake Summer Berry Icebox Cake will steal your heart (and tastebuds!) from the very first bite. Think creamy layers of pudding and whipped cream, bursting with sweet strawberries and juicy blueberries, all nestled between tender graham crackers and topped with a dreamy white chocolate drizzle. It’s a crowd-pleaser for every backyard BBQ, picnic basket, or lazy day treat—no oven required, just a little fridge magic and a whole lot of flavor.
Ingredients You’ll Need
Gathering up the ingredients for this No Bake Summer Berry Icebox Cake is as simple as can be, but each plays a deliciously important role. Creamy, sweet, and refreshingly fruity, every bite is a testament to the magic of pairing simple pantry staples with vibrant berries.
- Graham crackers: These create irresistible, tender cake-like layers after soaking in the creamy filling—don’t skip the softening time!
- Cream cheese (8 oz, softened): Adds a luscious tang and richness that balances the sweetness of the pudding and berries.
- Instant vanilla pudding mix (two 3.4 oz packages): Brings a thick, custardy texture to the filling and a boost of vanilla flavor.
- Cold milk (2-1/2 cups): Blends with the pudding mix to create a smooth, luscious base—be sure it’s well-chilled for the best texture.
- Cool Whip or homemade whipped cream (12 oz): Lightens the filling for an airy finish and makes each spoonful feel like summer on a cloud.
- Fresh strawberries (3 cups, sliced): Provide bursts of juicy, sweet flavor and gorgeous color in every bite.
- Fresh blueberries (1-1/2 cups): Their tartness balances the sweet creaminess and looks so inviting in the finished cake.
- White chocolate chips (2 oz): Melted and drizzled on top, they add a final touch of decadence and pretty flair to every slice.
How to Make No Bake Summer Berry Icebox Cake
Step 1: Prepare the Creamy Filling
In a large mixing bowl, beat together the softened cream cheese and dry instant pudding mixes until everything is wonderfully smooth and free of lumps. Start to gradually add the cold milk, beating to combine after each addition, and watch the mixture transform into a luxuriously thick pudding.
Step 2: Fold in Whipped Cream
Gently fold in the Cool Whip or your homemade whipped cream (remember to reserve ½ cup for topping later). You want to use a delicate hand so your filling stays perfectly light and airy, almost like a cross between cheesecake and classic pudding.
Step 3: Lay the Foundation
Spread a thin layer of the reserved Cool Whip just to coat the bottom of your 9×13 pan—this helps the graham crackers stick and start their transformation into soft, cake-like sheets.
Step 4: Begin Layering
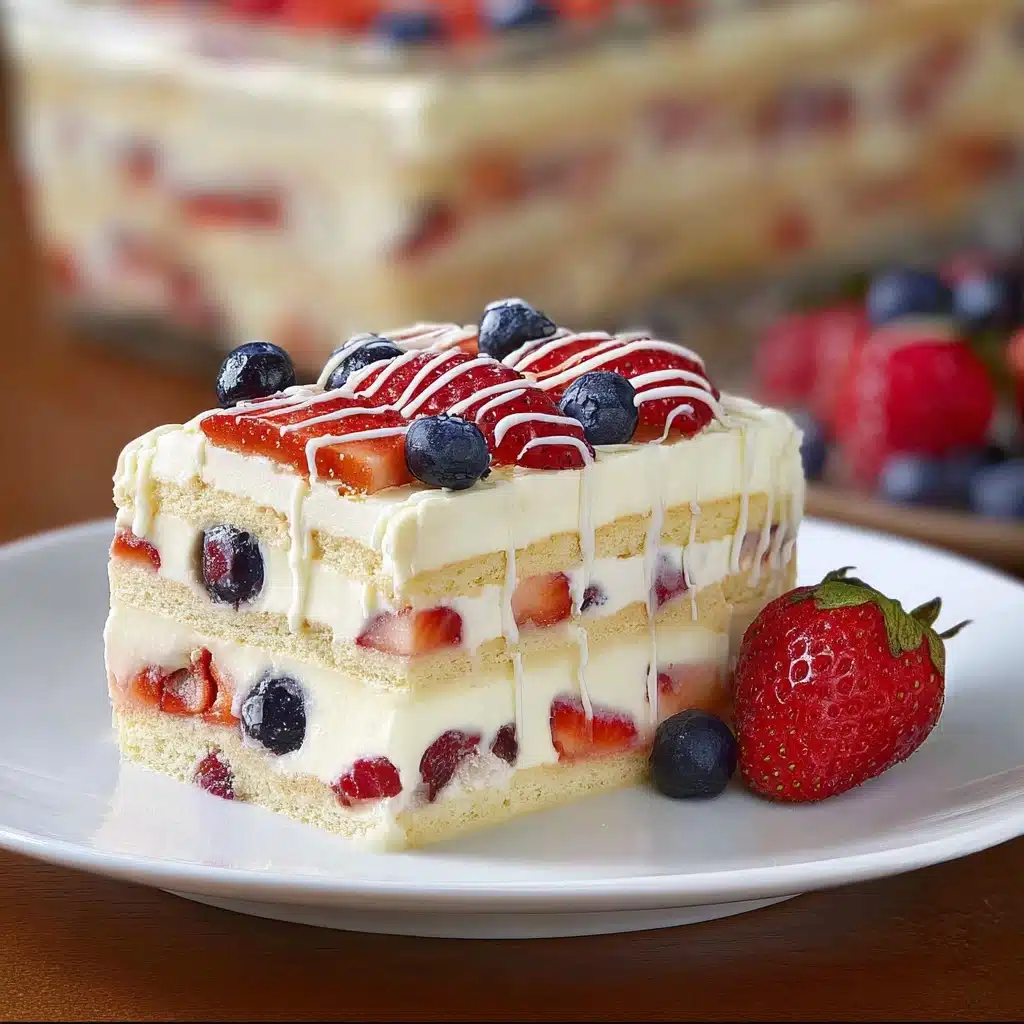
Lay 5 graham crackers across the center of the pan, then fit 2 more (breaking them as needed) along the edges to fully cover the base. Spread a generous layer of the creamy pudding mixture over the crackers, smoothing it with a spatula.
Step 5: Berry Time!
Sprinkle a bright, generous layer of sliced strawberries and fresh blueberries over the pudding. Don’t be shy—the more berries, the fresher and more colorful each slice will be!
Step 6: Repeat the Layers
Now comes the fun part: repeat the graham-pudding-berry layers two more times, ending with a final layer of berries right up to the top of the pan. You’ll have three stacked layers in total, each soaking up all those summery flavors.
Step 7: Chill to Perfection
Cover your pan and refrigerate for at least 4 hours (overnight is even better) so the graham crackers become tender and everything melds together into one sliceable masterpiece. The wait is the hardest part, but the payoff is worth every minute!
Step 8: Add the Finishing Touch
Melt the white chocolate chips according to package instructions and drizzle the glossy, sweet goodness over the top. Whether you use a spoon or a makeshift zip-top piping bag, it adds both beauty and the perfect bit of extra indulgence.
How to Serve No Bake Summer Berry Icebox Cake
Garnishes
Give your No Bake Summer Berry Icebox Cake a few finishing flourishes by adding extra fresh berries, a sprinkle of lemon zest, or even a handful of chopped mint just before serving. The fresh colors and flavors make every slice picture-perfect and even more tempting.
Side Dishes
This cake pairs beautifully with other summery treats—think a cold glass of lemonade, a scoop of vanilla ice cream, or bowls of fresh fruit on the side. Light and refreshing salads or even a medley of mini cookies make for a complete, festive dessert spread.
Creative Ways to Present
If you’re hosting or heading to a party, try assembling this cake in individual mason jars or parfait glasses for a fun, portable twist. For a special occasion, cut the finished cake into neat squares and serve on a platter, or offer a build-your-own “icebox cake bar” with bowls of extra fruit and sauces. The possibilities are as bright as the berries inside!
Make Ahead and Storage
Storing Leftovers
Cover any leftovers tightly with plastic wrap or transfer slices to an airtight container. The No Bake Summer Berry Icebox Cake will keep in the refrigerator for up to 3 days, and you might even find the flavors get richer as it sits.
Freezing
Yes, you can freeze this cake! Cut it into portions and place them on a lined baking tray to freeze for an hour, then transfer to a freezer-safe container. Freeze for up to 1 month—when you’re ready to enjoy, thaw overnight in the fridge. The texture stays creamy and delicious.
Reheating
Thankfully, this is one dessert that never needs reheating. Simply slice and enjoy straight from the fridge (or slightly chilled if it’s just come out of the freezer). It’s meant to be a cool, creamy escape on a hot summer day.
FAQs
Can I use frozen berries instead of fresh?
While fresh berries give the brightest flavor and best texture, frozen berries work in a pinch. Thaw them and pat dry thoroughly to prevent excess moisture from making the cake soggy.
What can I use instead of graham crackers?
If you don’t have graham crackers, try vanilla wafers, digestive biscuits, or even ladyfingers. Each will bring its own twist to the No Bake Summer Berry Icebox Cake.
How far ahead can I assemble the cake?
You can assemble the cake up to 24 hours in advance, which actually allows the flavors to develop even more. It’s the perfect make-ahead dessert for parties or potlucks!
Is there a dairy-free option?
Yes! Use dairy-free cream cheese, coconut whipped topping, and plant-based pudding mixes to make a dairy-free version of this summer stunner.
Can I swap out the berries for other fruits?
Absolutely—raspberries, blackberries, peaches, or even sliced bananas work well in the No Bake Summer Berry Icebox Cake. Just aim for fruits that won’t release too much liquid as they chill.
Final Thoughts
I hope you’ll give this No Bake Summer Berry Icebox Cake a try the next time you want something spectacular, simple, and just a little bit nostalgic. Whether you’re sharing it with friends or enjoying a sneaky midnight slice, it’s the kind of recipe that always brings smiles. Happy (no) baking!
PrintNo Bake Summer Berry Icebox Cake Recipe
This No Bake Summer Berry Icebox Cake is a refreshing and easy-to-make dessert perfect for the warmer months. Layers of graham crackers, creamy pudding, and fresh berries topped with a white chocolate drizzle make this a delightful treat for any occasion.
- Prep Time: 20 minutes
- Total Time: 4 hours 20 minutes
- Yield: 12 servings 1x
- Category: Dessert
- Method: No Bake
- Cuisine: American
- Diet: Vegetarian
Ingredients
Graham Cracker Layer:
- 19 oz graham crackers
Pudding Mixture:
- 8 oz cream cheese, softened
- 2 (3.4 oz) packages Vanilla Instant Pudding
- 2–1/2 cups cold milk
- 12 oz Cool Whip or homemade whipped cream
Berry Layers:
- 3 cups fresh strawberries, sliced
- 1–1/2 cups fresh blueberries
Additional Topping:
- 2 oz white chocolate chips
Instructions
- Prepare Pudding Mixture: Beat cream cheese and dry pudding mixes in a large bowl with a mixer until blended. Gradually beat in milk.
- Add Whipped Cream: Gently stir in Cool Whip or homemade whipped cream, reserving ½ cup.
- Layering: Spread a thin layer of Cool Whip in a 9×13 pan. Layer graham crackers, pudding mixture, and berries as instructed, repeating layers to fill the pan.
- Chill: Refrigerate for at least 4 hours or overnight until graham crackers soften.
- White Chocolate Drizzle: Melt white chocolate chips and drizzle over the dessert before serving.
Nutrition
- Serving Size: 1 slice
- Calories: 320
- Sugar: 23g
- Sodium: 320mg
- Fat: 16g
- Saturated Fat: 9g
- Unsaturated Fat: 6g
- Trans Fat: 0g
- Carbohydrates: 40g
- Fiber: 2g
- Protein: 5g
- Cholesterol: 30mg
Keywords: No Bake, Summer, Berry, Icebox Cake, Dessert, Graham Crackers, Pudding, Cool Whip, Strawberries, Blueberries, White Chocolate


