Baked Piroshki Recipe (2 Filling Options : Sweet or Savory) Recipe
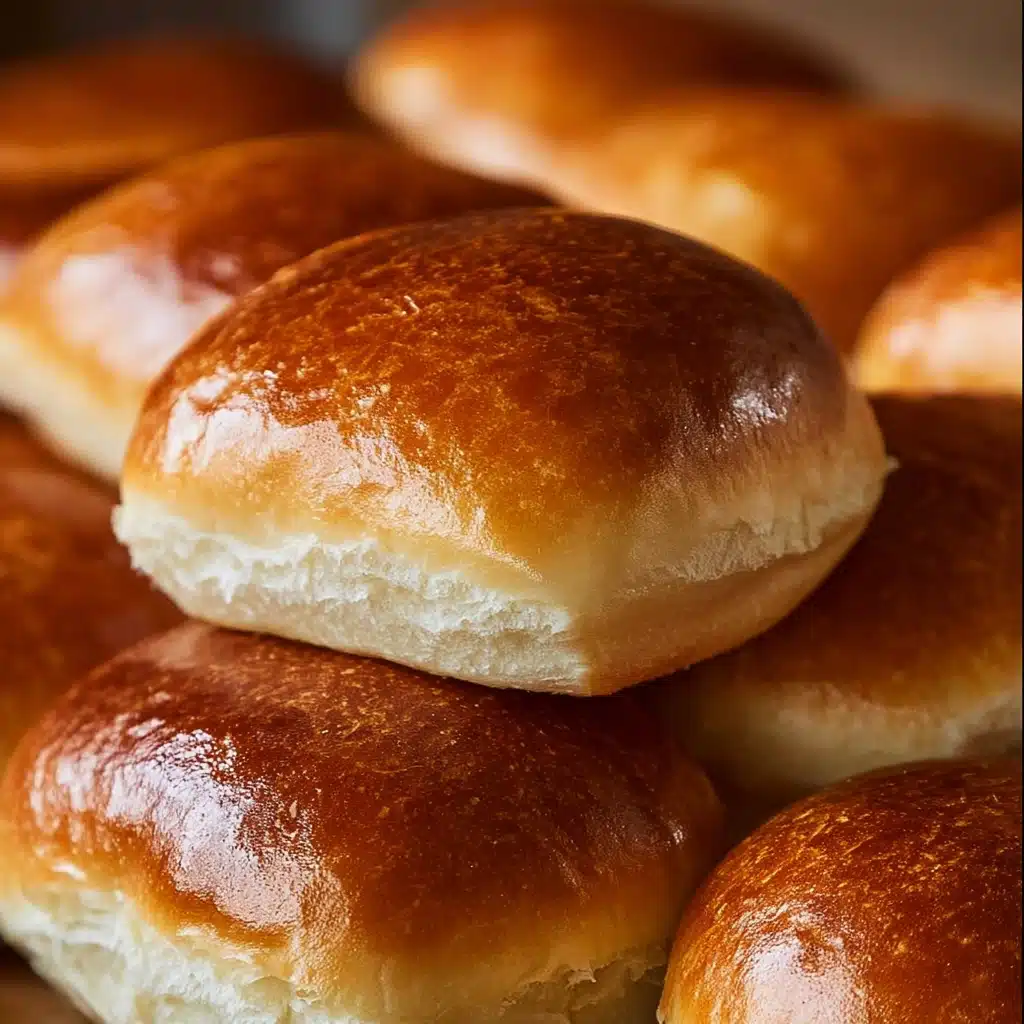
If you adore comforting pastries that are built for sharing, prepare to fall in love with this Baked Piroshki Recipe (2 Filling Options : Sweet or Savory). Whether you lean toward a cozy apple filling dusted in sugar or hearty braised cabbage, these fluffy, golden buns are a celebration of everything homey and delicious. They pack a tender crumb, a gleaming finish, and the pure joy of Russian baking—all in one bite-sized package. Let’s get you rolling dough and filling your kitchen with the most irresistible aroma.

Ingredients You’ll Need
This recipe shines with a handful of kitchen staples that create the ultra-tender, slightly sweet dough and those dreamy fillings. Every ingredient plays a role, from the rise and texture of the bread to the flavor-packed filling inside—just the essentials for authentic, bakery-style results.
- Warm Milk: The gentle heat activates the yeast and adds richness to the dough.
- Active Dry Yeast: This gives your piroshki their gloriously soft fluff and lightness.
- Sugar (divided): Adds sweetness to both dough and filling, essential for flavor and browning.
- All-Purpose Flour: The backbone of the dough—use divided as directed for structure and tenderness.
- Eggs: Three go in the dough for richness, plus an extra for that crowd-pleasing, shiny egg wash.
- Melted Butter: Brings gorgeous flavor and a supple crumb to your rolls.
- Salt: Just a pinch balances the sweet dough and enhances every flavor.
- Apples: For the sweet filling, they cook down into a tangy, jammy surprise.
- Granulated Sugar: Essential for the apple filling and final glossy finish on sweet piroshki.
- Braised Cabbage (with or without beef): The savory option—make it rich and flavorful for a memorable bite. (Tip: Small pieces work best!)
How to Make Baked Piroshki Recipe (2 Filling Options : Sweet or Savory)
Step 1: Make the Apple Filling
Start by finely chopping your apples in a food processor for an even, tender texture. Sauté them in a skillet over medium-high heat with a sprinkle of sugar until most of their juice has evaporated and they’re gently caramelized—about 10 minutes. This step delivers a lusciously thick and glossy filling, perfect for the sweet version of your Baked Piroshki Recipe (2 Filling Options : Sweet or Savory). Set aside to cool completely before using.
Step 2: Prepare the Yeast Mixture
Pour the warm milk into your mixer bowl and sprinkle the yeast overtop. Let it sit for 5–7 minutes until it gets lovely and foamy. This little waiting period is when the magic happens and gives your dough an extra-fluffy rise every time.
Step 3: Mix the Initial Dough
Add 1 cup of flour and ¼ cup of sugar to the frothy yeast mixture. Whisk it up until smooth, and let it rise for 30–45 minutes at room temperature (or speed things up by placing it in a warm 100°F oven for 20 minutes). This first “sponge” builds complex flavor and a lighter crumb.
Step 4: Add the Eggs, Butter, and Salt
Whisk in the rest of the sugar, eggs, melted butter, and salt. These add depth, beautiful color, and a touch of richness to the dough for your Baked Piroshki Recipe (2 Filling Options : Sweet or Savory).
Step 5: Incorporate the Flour and Knead
Using your dough hook, add the remaining flour a cup at a time. Be patient—this step sets your dough’s tender structure. Drizzle in the last cup slowly (about ½ cup at a time) until the dough just pulls away from the sides, staying slightly tacky. Knead for about 15 minutes on low to build elasticity and structure.
Step 6: First Rise
Cover the dough with plastic wrap and give it a cozy spot in a warm oven (100°F, never hotter!) for an hour or let it triple in size at room temperature in about two hours. This rise puffs up your dough into a cloud, primed for delicious filling.
Step 7: Shape the Dough
Turn the pillowy dough onto a floured surface and divide into five portions. Roll each into a 13–14 inch circle, keeping the pieces covered to prevent drying out. This helps you get beautifully even, bakery-worthy piroshki.
Step 8: Cut and Fill
With a pizza cutter, slice each circle into 8 triangles. Add about ½ tablespoon of your chosen filling—apple for sweet, or that savory braised cabbage—onto the wide end of each triangle. Be generous but mindful not to overstuff or they’ll be tough to seal!
Step 9: Roll and Seal
Bring both sides over the filling and pinch tightly down the length. Fold the tiny corners in, then roll from the wide end to the pointed tip, sealing edges as you go. This locks all the deliciousness inside your Baked Piroshki Recipe (2 Filling Options : Sweet or Savory).
Step 10: Second Rise
Arrange the piroshki seam-side down on a parchment-lined baking sheet, giving them space to expand. Let them rise in a slightly warm oven for 20 minutes (or until they’re brushing up against each other), so they bake up ultra-fluffy.
Step 11: Bake to Golden Perfection
Preheat the oven to 360°F. Brush each piroshki with beaten egg, and bake for about 20 minutes or until the tops are irresistibly golden and shiny. The aroma will have everyone hovering in the kitchen!
Step 12: Sweet Finishing Touch
As soon as the sweet piroshki come out of the oven, brush them with a little sugar-water for a gorgeous, glossy finish. Let them cool a few minutes—if you can stand to wait!—before serving.
How to Serve Baked Piroshki Recipe (2 Filling Options : Sweet or Savory)

Garnishes
For extra flair, dust your sweet piroshki with powdered sugar or drizzle with a little honey after baking. If you’re serving the savory ones, sprinkle a few poppy or sesame seeds into the egg wash before baking for a little crunch and visual intrigue. Both versions look and taste irresistible on a platter topped with fresh herbs or delicate fruit slices.
Side Dishes
Pair the savory Baked Piroshki Recipe (2 Filling Options : Sweet or Savory) with a bowl of warming borscht or a fresh green salad with zesty vinaigrette—it’s the ultimate comfort meal. For sweet piroshki, serve alongside a cup of strong tea or coffee for a cozy, satisfying treat that feels like a bakery breakfast at home.
Creative Ways to Present
Arrange piroshki upright in a bread basket for family-style sharing, or set them on a wooden board with dipping sauces like sour cream, honey, or fruit preserves for a casual buffet. Mini versions are also fabulous for parties or picnics—everyone gets to grab their favorite filling!
Make Ahead and Storage
Storing Leftovers
Store cooled Baked Piroshki Recipe (2 Filling Options : Sweet or Savory) in an airtight container at room temperature for up to two days, or refrigerate to keep them fresh and tender for up to five days. Make sure to layer parchment between them to avoid sticking.
Freezing
Once your piroshki are completely cooled, pop them in a freezer-safe bag or airtight container. They’ll stay delicious for up to two months. Freeze individually if possible, so you can thaw just what you need for a quick snack or an impromptu get-together.
Reheating
To refresh that just-baked magic, reheat piroshki in a 300°F oven for about 8–10 minutes. They’ll emerge warm, soft, and as wonderful as the day you made them. Microwave works in a pinch, but the oven restores that crusty golden top best!
FAQs
Can I use a different fruit for the sweet filling?
Absolutely! Pears, plums, or even berries all work beautifully for the sweet filling—just chop them finely and cook them down as you would the apples. Feel free to get creative based on what’s in season or in your kitchen.
Is it possible to make the dough by hand?
Yes! While a stand mixer makes things easier, this dough is very forgiving. Just use a sturdy wooden spoon and plenty of elbow grease, kneading until the dough feels smooth and elastic. Give yourself a little more time for kneading if going by hand.
What’s the best way to make sure my piroshki don’t open during baking?
Be sure to pinch the seams tightly together and place the piroshki seam-side down on the baking sheet. A bit of water on your fingers can help seal dough if it feels dry. Also, avoid overfilling to prevent leaks.
Can I prepare Baked Piroshki Recipe (2 Filling Options : Sweet or Savory) ahead of time?
Definitely! Shape and fill the piroshki, then place them on a tray and refrigerate overnight before the second rise. Let them come back to room temperature and complete their second rise before baking as usual for a stress-free morning.
What’s the secret to fluffy, pillowy dough?
Letting the dough rise until it’s truly tripled in size, kneading until smooth and tacky (not dry), and using fresh yeast are all key. Don’t rush the rising steps—they’re what make Baked Piroshki Recipe (2 Filling Options : Sweet or Savory) so irresistible and tender every time!
Final Thoughts
Whether you crave something sweet or can’t resist a savory bite, this Baked Piroshki Recipe (2 Filling Options : Sweet or Savory) is pure homemade comfort in golden, bakery-fresh form. There’s a true joy in rolling, filling, and sharing these pillowy buns, and I hope this hands-on, flavor-packed recipe finds a happy home in your kitchen. Happy baking, and be sure to treat yourself and your loved ones to this delicious slice of tradition!
PrintBaked Piroshki Recipe (2 Filling Options : Sweet or Savory) Recipe
Delicious baked piroshki recipe with two filling options – sweet apple or savory braised cabbage. These Russian pastries are perfect for any occasion, with a soft, fluffy dough and flavorful fillings.
- Prep Time: 30 minutes
- Cook Time: 20 minutes
- Total Time: 3 hours
- Yield: 40 piroshki 1x
- Category: Appetizer, Snack
- Method: Baking
- Cuisine: Russian
- Diet: Vegetarian
Ingredients
Dough:
- 2 cups warm milk
- 1 tablespoon active dry yeast
- ½ cup sugar, divided
- 6 cups + 2 tablespoons all-purpose flour (divided: 1 cup and 5 cups + 2 tablespoons)
- 3 eggs
- 1½ tablespoons melted butter
- 1 teaspoon salt
- 1 egg, beaten (for egg wash)
Apple Filling:
- 2 apples
- ⅓ cup granulated sugar
Braised Cabbage Filling:
- (For the full Braised Cabbage with Beef recipe, visit NatashasKitchen.com. If using beef, be sure to cut it into small pieces suitable for filling.)
Instructions
- Prepare the Apple Filling: Finely chop the apples using a food processor. Sauté with ¼ cup sugar in a skillet until most liquid evaporates. Set aside to cool.
- Start the Dough: Combine warm milk and yeast in an electric mixer bowl. Let sit until foamy.
- Mix Initial Dough Ingredients: Add 1 cup flour and ¼ cup sugar. Let rise.
- Add Remaining Ingredients: Whisk in eggs, sugar, melted butter, and salt.
- Incorporate Flour: Slowly add remaining flour and knead for 15 minutes.
- First Rise: Let dough rise until tripled in size.
- Shape the Piroshki: Divide dough, roll into circles, cut into triangles.
- Cut and Fill: Place filling at wide end of each triangle.
- Roll the Piroshki: Roll triangles, seal edges.
- Second Rise: Let piroshki rise until puffed.
- Bake: Brush with egg wash and bake until golden.
- Finishing Touch: Brush with sugar water for sweet piroshki.
Nutrition
- Serving Size: 1 piroshki
- Calories: 180
- Sugar: 8g
- Sodium: 150mg
- Fat: 4g
- Saturated Fat: 2g
- Unsaturated Fat: 2g
- Trans Fat: 0g
- Carbohydrates: 30g
- Fiber: 1g
- Protein: 5g
- Cholesterol: 30mg
Keywords: Baked Piroshki, Russian pastries, Sweet Apple Filling, Savory Braised Cabbage, Dough Recipe


